
Avid Pro Audio Community
How to Join & Post Community Terms of Use Help Us Help YouKnowledge Base Search Community Search Learn & Support
|
|
Avid Pro Audio CommunityHow to Join & Post Community Terms of Use Help Us Help YouKnowledge Base Search Community Search Learn & Support |
|
|
|||||||
 |
|
|
Thread Tools | Search this Thread | Display Modes |
|
#1
 04-13-2011, 03:33 PM
|
|||
|
|||
|
What's up DUC?! Now I know this site doesn't allow IMG code and no one wants to click all those links. So if you guys want, you can view this same thread here: http://www.johnlsayers.com/phpBB2/vi...hp?f=2&t=15832
Firstly, I am building a dual wall/dual door design. The existing outer wall is actually going to be the outer wall/leaf for the sides and rear outer booth walls. We are removing the current sheet rock and replacing the standard insulation with Roxul 3" x 16" x 48" AFB. No drywall is going back on. Then we are building the inner walls with the Roxul as well, with drywall only on the booths inner surface. There is not gonna be any drywall between the leafs. The front/control room wall will have a new outer and inner built. The front walls will also contain the 30" x 24" laminated windows as well as two 32" x 80" steel flush doors (not solid steel, too much $$$). Would have went with 30" doors but the ones I am getting only come in 32" and and 36". Still have plenty of room for the 32". We are also removing the window and replacing it with studs, plywood, and siding. So overall we have about a 7' x 9' area to build in. So I'm shooting for roughly a 4' x 8' booth interior (non-parallel walls). For drywall we are using 4' x 8' x 1/2" Quietrock 500, doubled up for a total off 1" of drywall on all visible surfaces. Inner and outer studs will be 3" apart making a total of a 12" thickness for the inner and outer walls with a 10" air gap inside. In the end I will still have a good 12'-13' x 9' control room which isn't bad. So I'm really happy. Day 1: I knew early on that my floor was shot in the corner because it sagged when you walked on it. Thought the floor surface was just rotted. So we were gonna replace the section and build on top of that. Turns out the supporting beam under the floor was eaten away by termites. Started taking the floor up and noticed a huge chunk of the beam shot. Luckily the garage was built on a concrete slab. So we ripped the whole floor out and was gonna use 2 x 3's to build a new floor. However, the concrete is uneven so we'd have to level it out before putting a new floor in, which may require several bags of self leveling underlayment. I am undecided on what to do with the floor since I am already $1000 over budget. My uncle suggested cleaning the concrete really good and putting a nice thick padding on it, then some really plush carpet. It would be the cheapest, but I kinda wanted a nice hard wood floor. I am open to suggestions on this. (EDIT: Decided to go with standard 5/8" over the QuietRock). Anyway, pics:     So after taking up the floor, it was onto removing the existing drywall. Can you say "another can of worms"?! Nearly every stud holding up the side wall next to my extry door was eaten away. There was about two decent studs holding that side of the wall up. On top of that, there were live termites crawling around in there. And we've been paying terminex a monthly fee for the last 3 years to prevent this issue. So this entire wall had to be taken down and replaced, which was not planned, nor budgeted for, and took most of our time today. Luckily all this labor is free for me since it's family doing it. Only ran the budget up another $100 for material. There are also a couple studs on the other two walls that need replacing, but nothing compared to this wall. The window is also being removed and patched.                   So for the base plate, my brother-in-law used treated 2 x 4 and wrapped it in aluminum flashing to help prevent future termites from getting to it. Terminex is also coming on Monday to hose this crap down. Anyway, for the new wall, we went with some new 2 x4' covered in two sheets of 3/4" ply, the bottom one treated and the top standard CDX. Then covered in tar paper and reinstalled the siding.            Now, the construction of the inner wall. I REALLY wanted to do a full floating inner structure, but we only have 7' of height to play with. The problem that comes with that is the doors. We are using steel flush exterior doors and as it is, we only are gonna have about an inch or so of clearance from the ceiling for the inner door to swing after treating the ceiling. And I do not want to cut steel doors. We could have went with solid core wood doors, but then I'm worrying about warpage and budget. I have not purchased the doors yet, but they are already framed out basically. So the inner structure is going to contact the floor and ceiling. Hoping for the best though. Any suggestions here are welcomed.         Frame out for the inner window.       Nice air gap.   Bottom plate.   So that's it for now. Tomorrow I have to fix some electrical. The ground is broken in the wire under the window and instead of fixing it, the house renovator we bought the house from electrical taped it up. As a result, 4 of my 6 outlets had no ground. I patched it last summer, but while we are in there, I'm gonna fix it right. Then I'm gonna pull the wire out of the studs so the Roxul can sit nicely as possible in there. Then I'll install the roxul! Hopefully next weekend the Quietrock, glass and doors will go in. Day 2 Day 2 was yet another fun day opening cans of worms. Started off by opening an entrance to the upper ceiling above my studio from the storage side of the garage to see if beams could be cut to fully decouple the inner booth from the rest of the studio, as well as to remove the old insulation to make room for the recessed LED lighting and Roxul insulation. Turns out the beams were structural so I'll have to live with it. If only the ceiling were 8' high instead of 7'. Then decoupling would be no problem at all. Also, found evidence of either mice or squirrels chilling in the ceiling. A lot of the fiberglass insulation was eaten or removed, there was feces in one spot, and a couple of wires have chewed insulation. Bummer! Also replaced a broken electrical wire that had a bad ground and removed the wire from running through the center of the beams to make room for roxul. 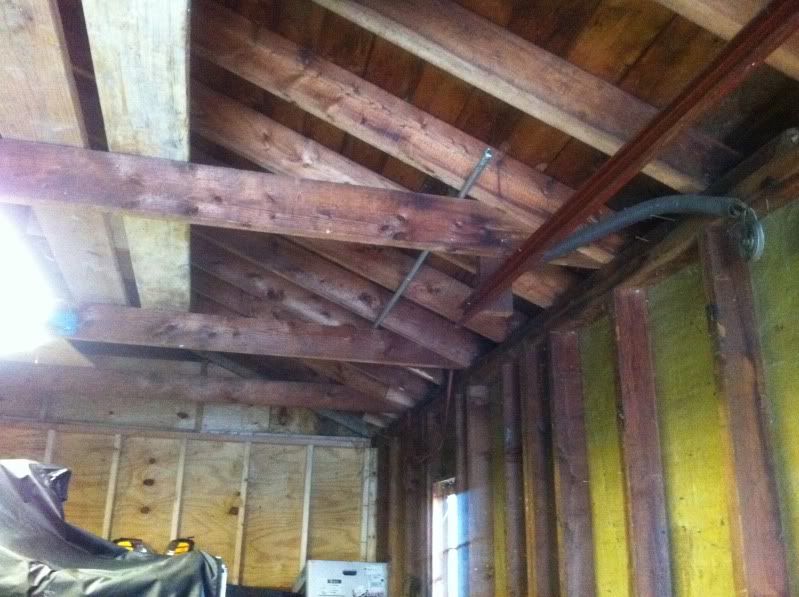 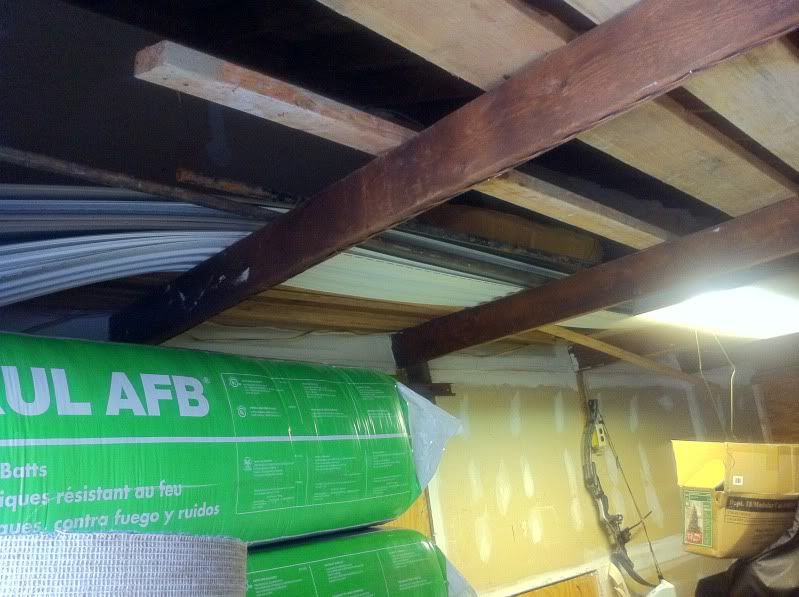 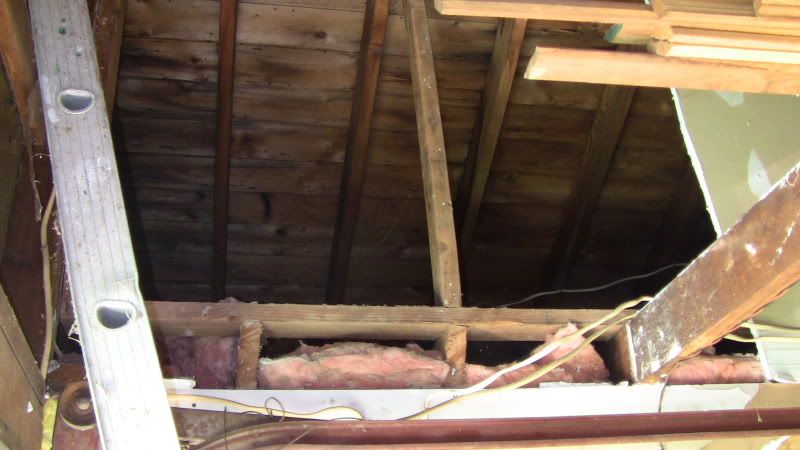 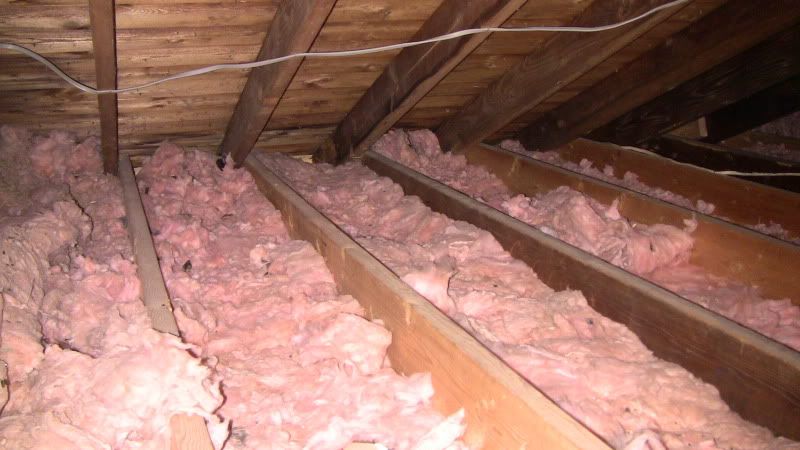 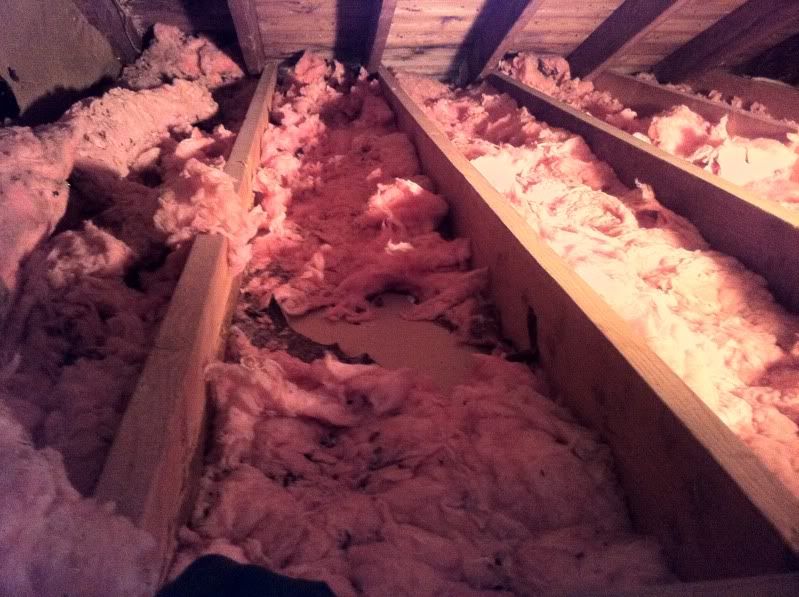 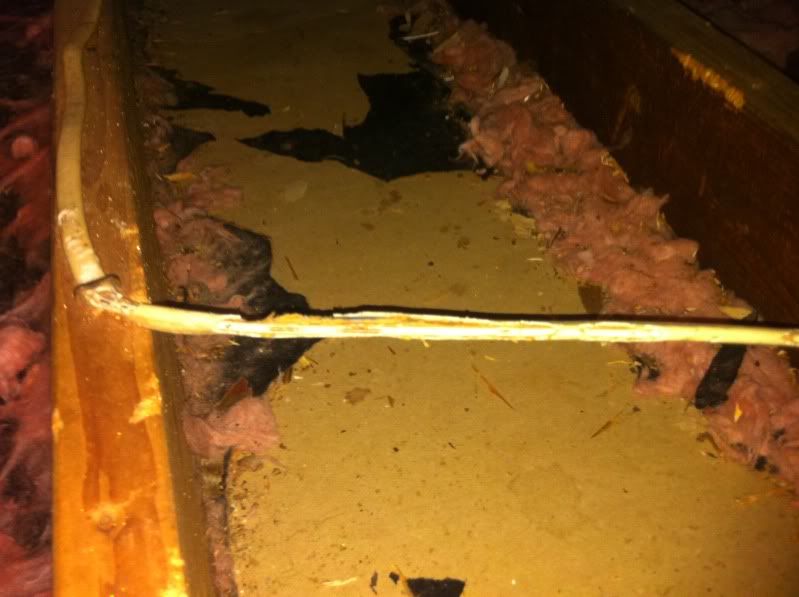 Day 3 Today was really productive. Started off with my father-in-law helping me level the floor for inside the booth. Took 4 bags of self leveling cement mix. Dried nicely, quickly and evenly! Once the floor hardened, we started on installing the recessed LED's. My father-in-law marked and cut out the openings from the bottom while my uncle and brother-in-law mounted the housings and did the wiring up top. These are IC rated lighting housings so they can be insulated. Once they finished the wiring up top, my father-in-law and I mounted the LED's and I finished the wiring down bottom. And where he cut the holes is perfect because the light on the left is just about centered with the booth window so it will shine right over top of the vocalist. I put them on a dimmer switch so the vocalist can change the vibe while recording. I also siliconed the gap between the light housings and the sheetrock, as well as sillconed the housing brackets to the upper ceiling to prevent rattling and sound leakage through the lights. Once I finished wiring and siliconing the lights, Terminex finally came to address the termite issue. Turns out that since the garage is detached from the house, it isn't covered on my regular monthly Terminex service. Been with them for almost 3 years and had no idea until today! So boom, another unexpected $500 for the treatment. $120 to level my floor and this guy has to drill into it 4 hours later to kill termites. :lol: Once he sprayed everything down and all inside the walls, I went ahead and installed some roxul in all the outer walls except the are where we will be removing the window. Then I called it a night. 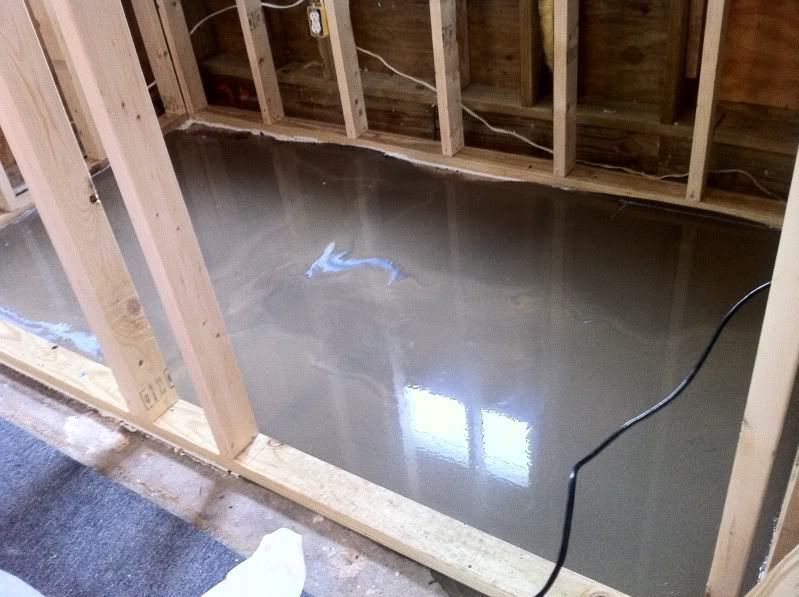 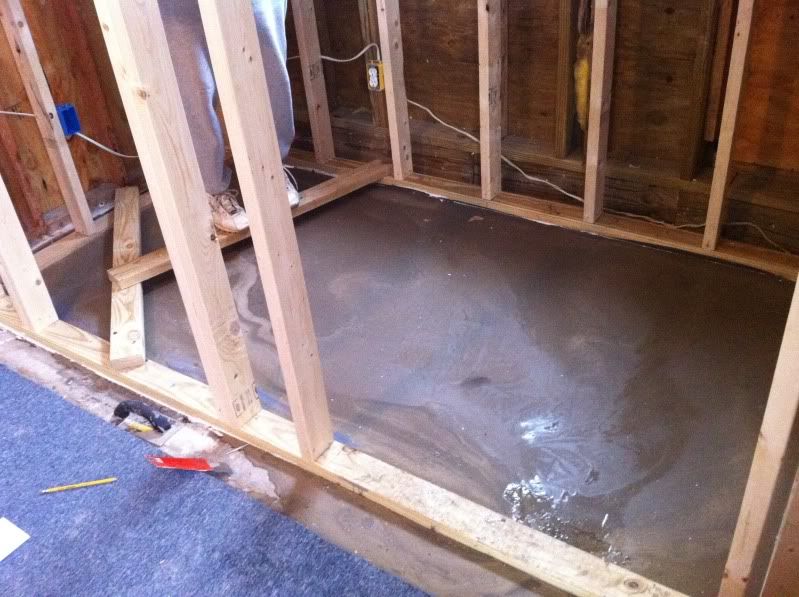  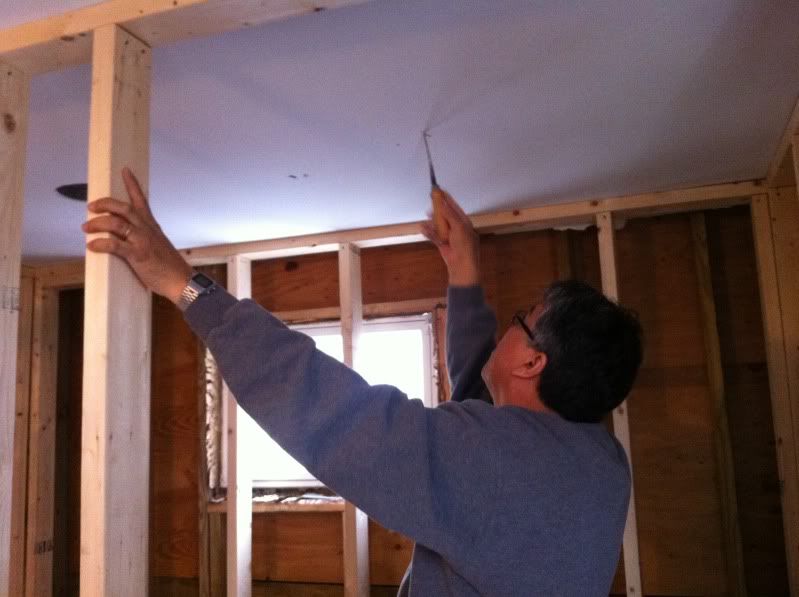 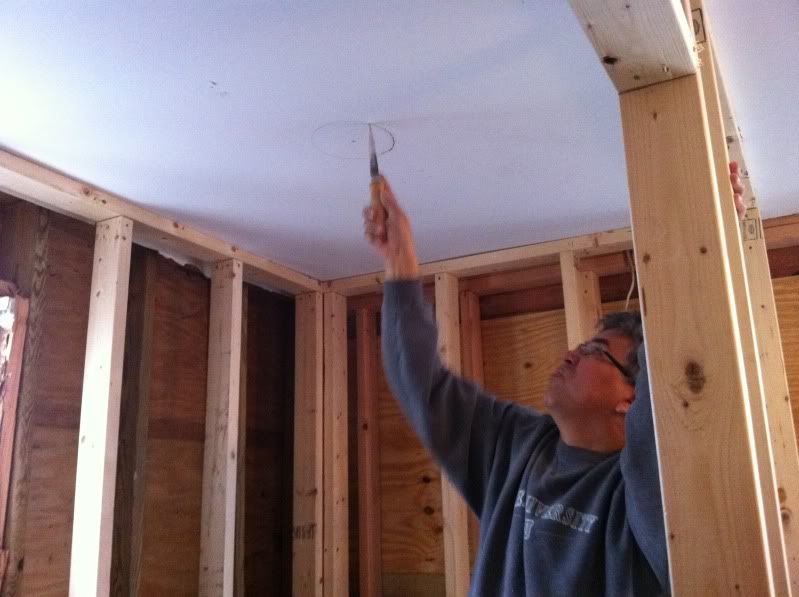 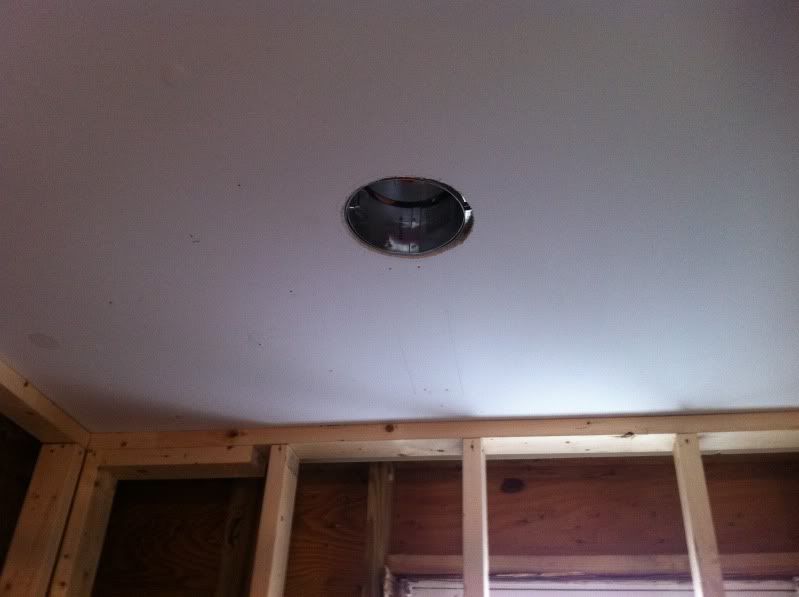 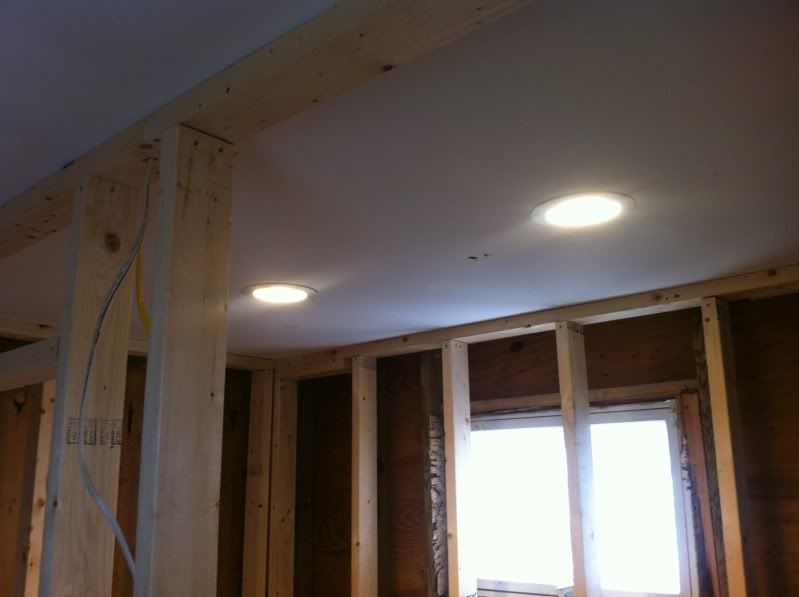 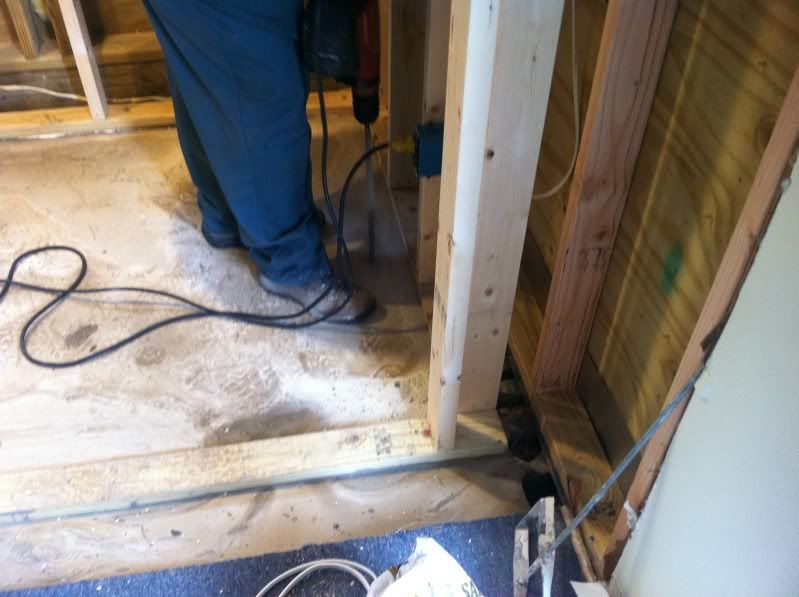 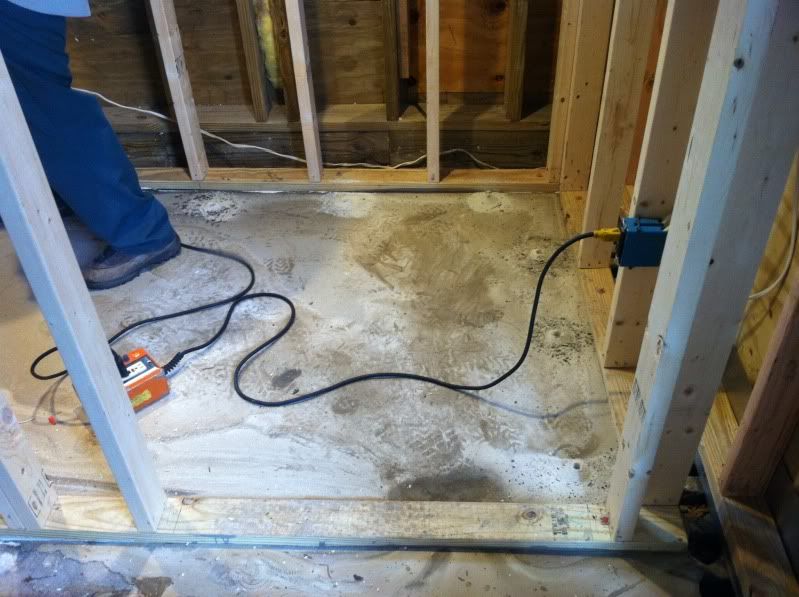 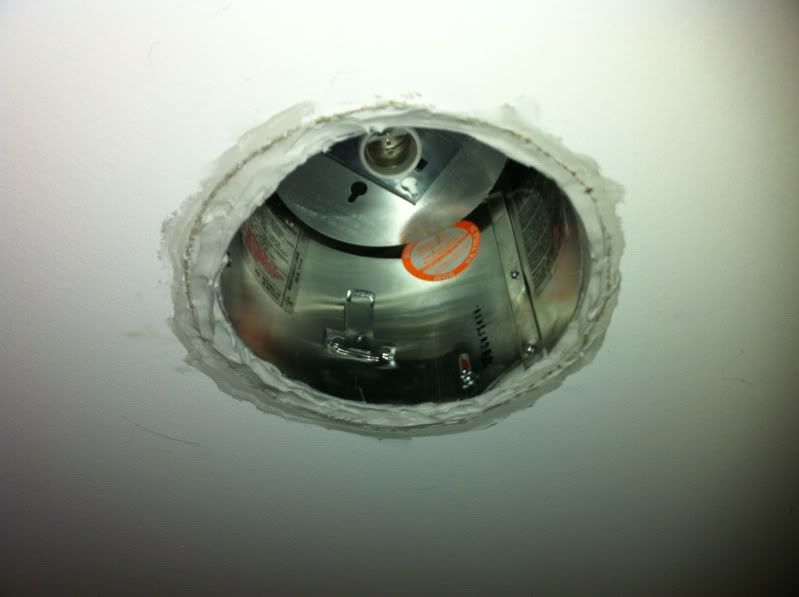 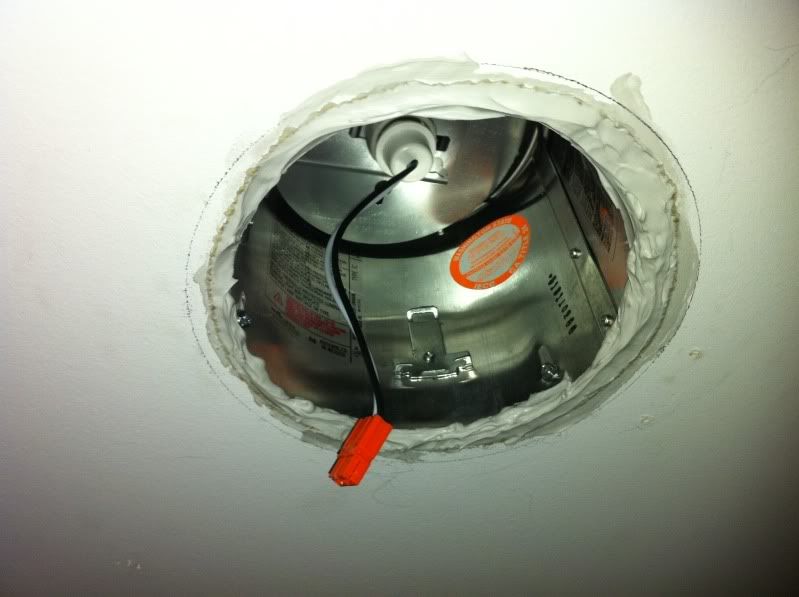 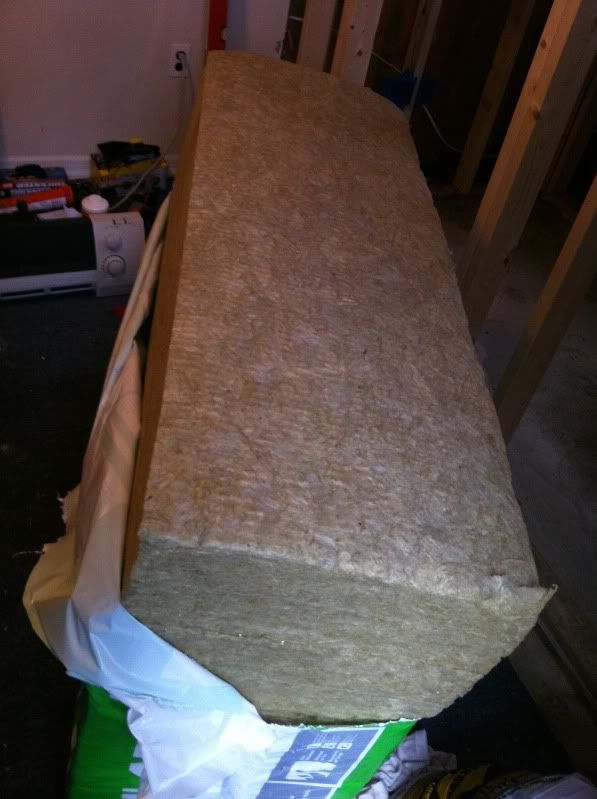 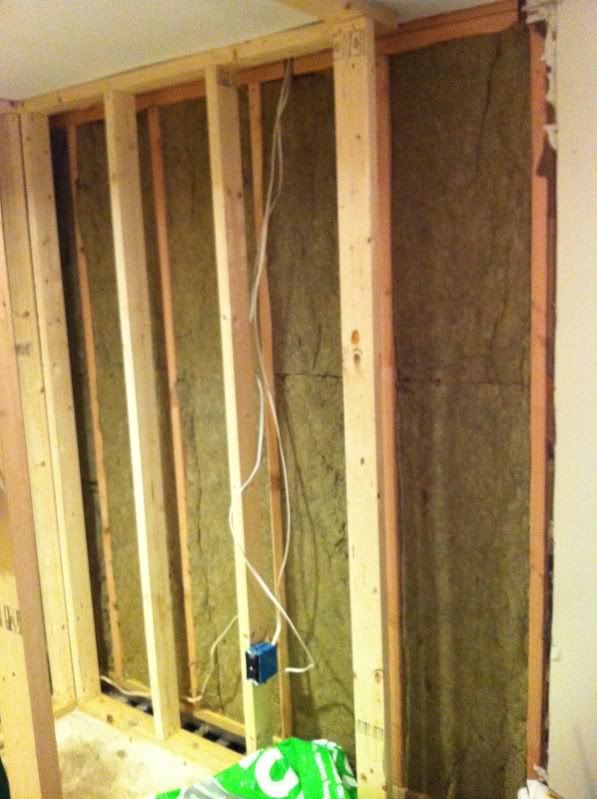 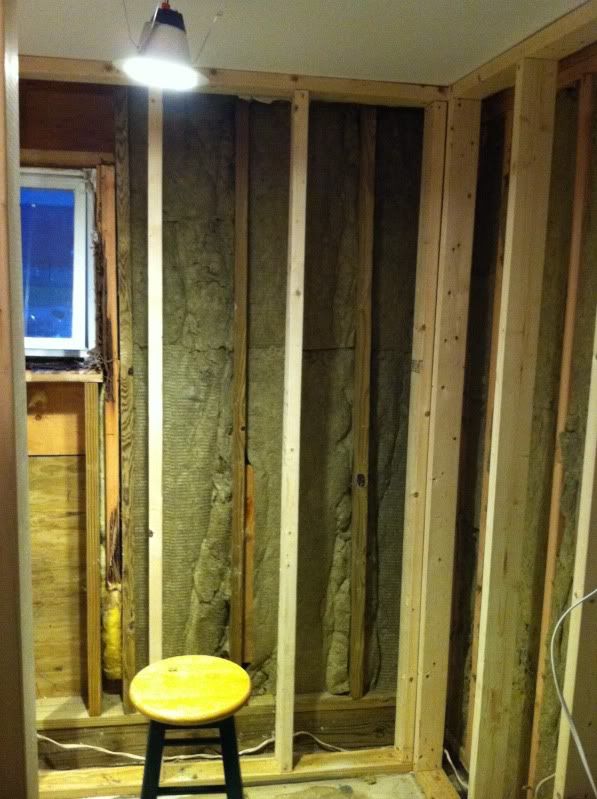 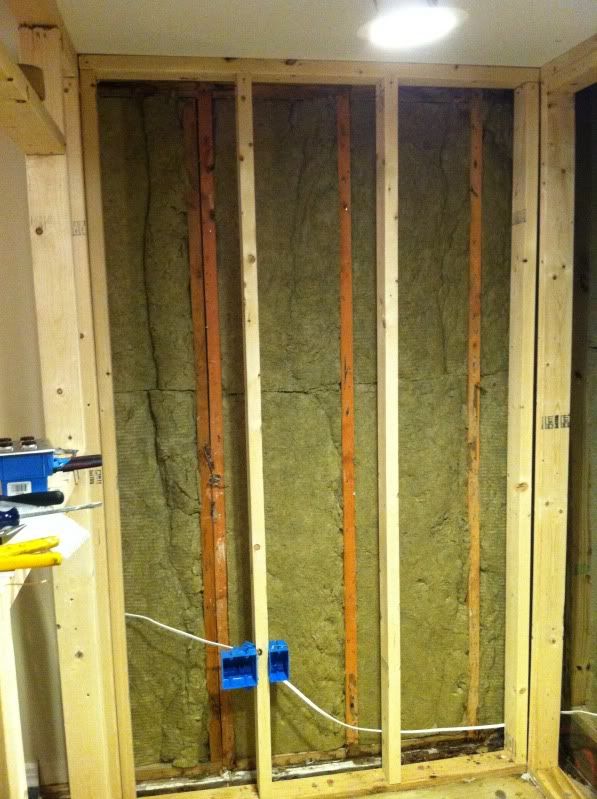 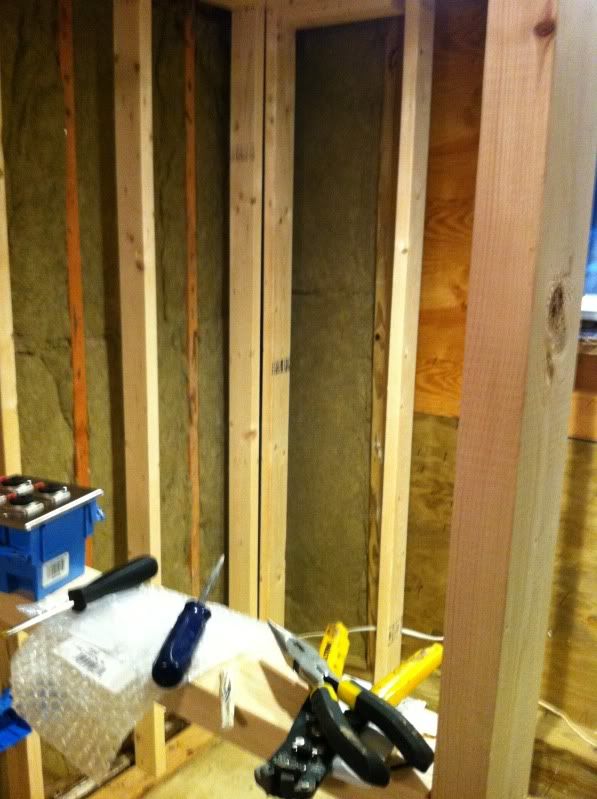 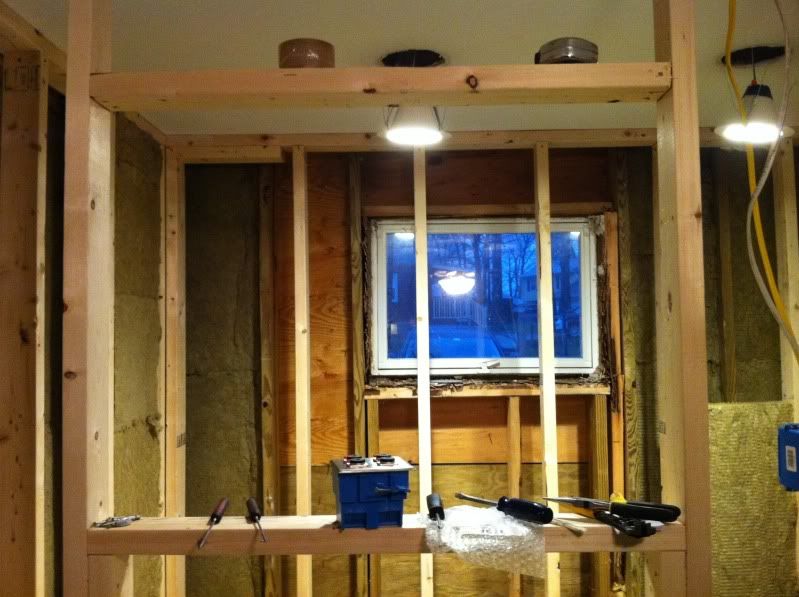 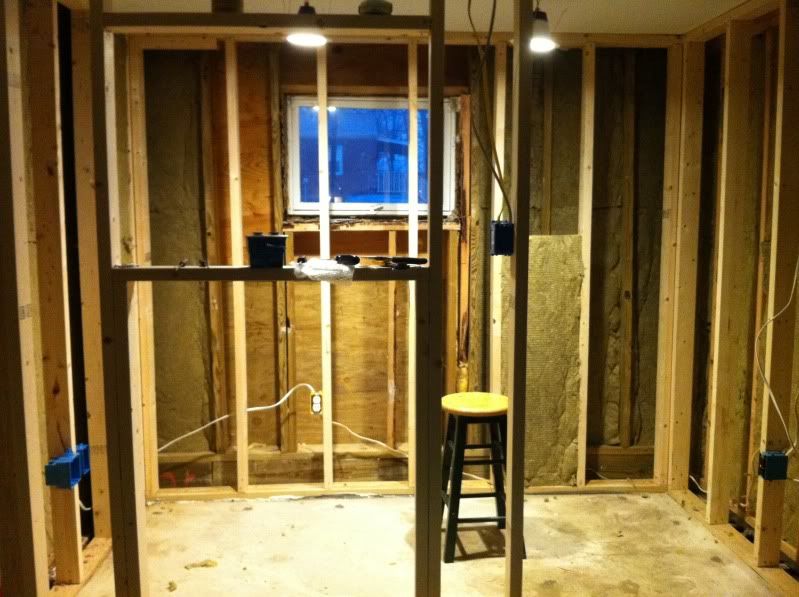 Day 4 Today was another day by myself. I started off by filling the holes in the bricks with concrete. I did a bit of over kill with it (I hope I mixed it right  ). Then I ran the wires for the mic and trs wall plates and put some Quiet Putty on all the boxes. After that I installed some more roxul and ended early today. Once I figure out how the studs are gonna be spaced after we remove that window, I will fill in the rest of the back walls with Roxul. ). Then I ran the wires for the mic and trs wall plates and put some Quiet Putty on all the boxes. After that I installed some more roxul and ended early today. Once I figure out how the studs are gonna be spaced after we remove that window, I will fill in the rest of the back walls with Roxul.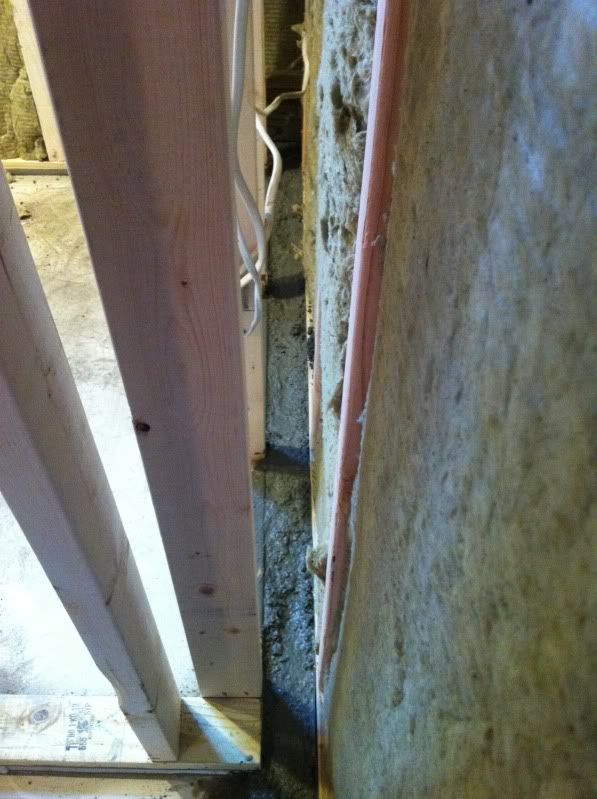 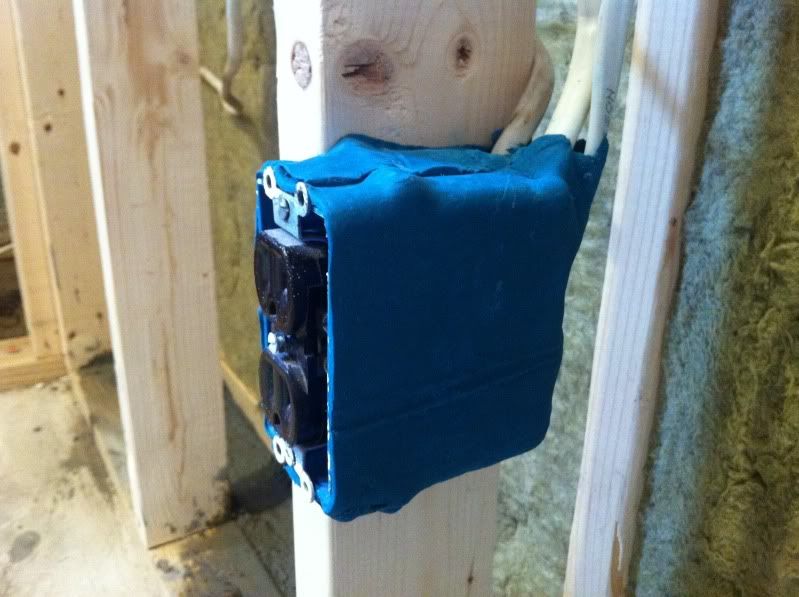  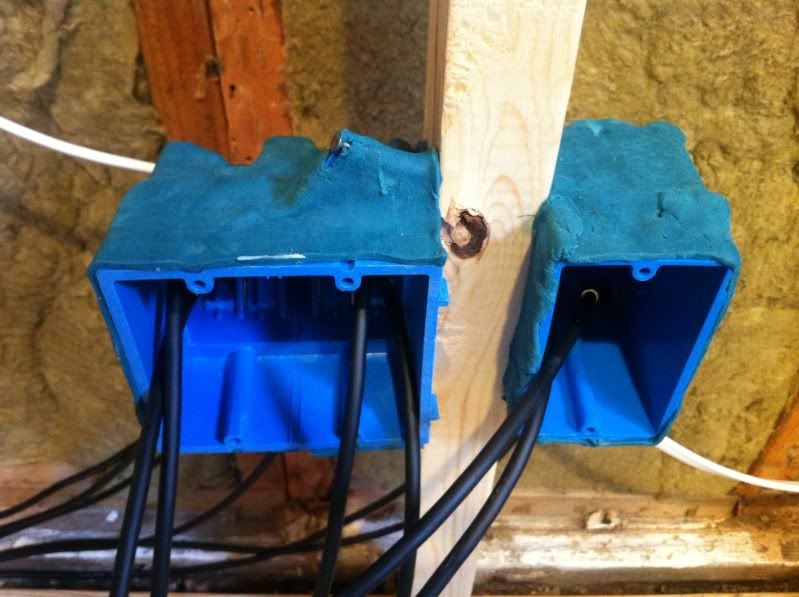 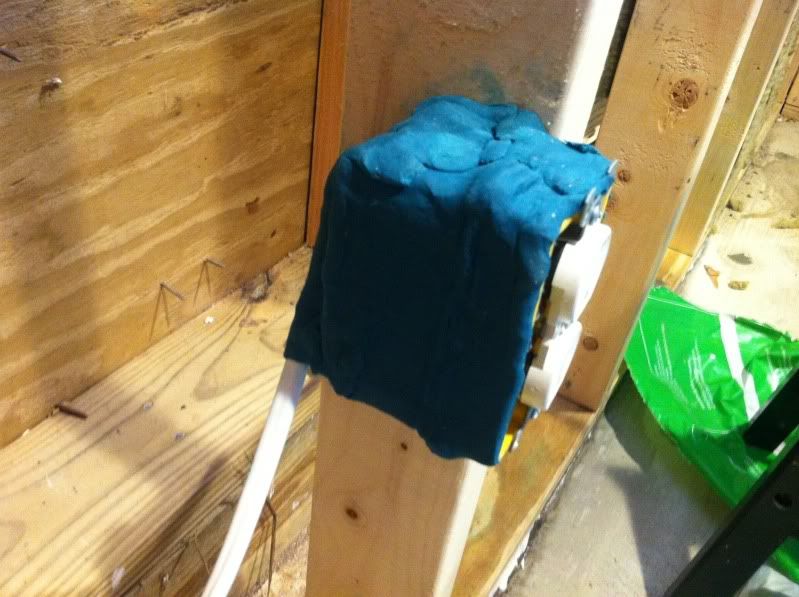 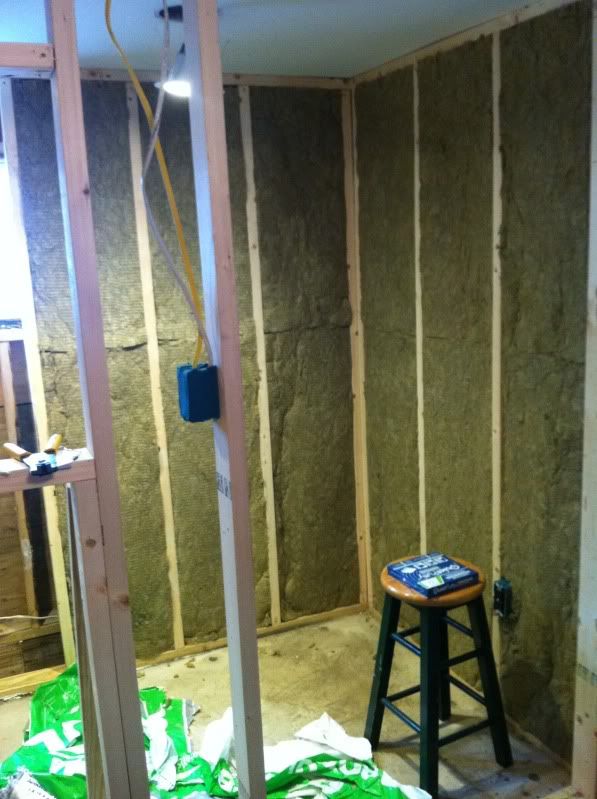 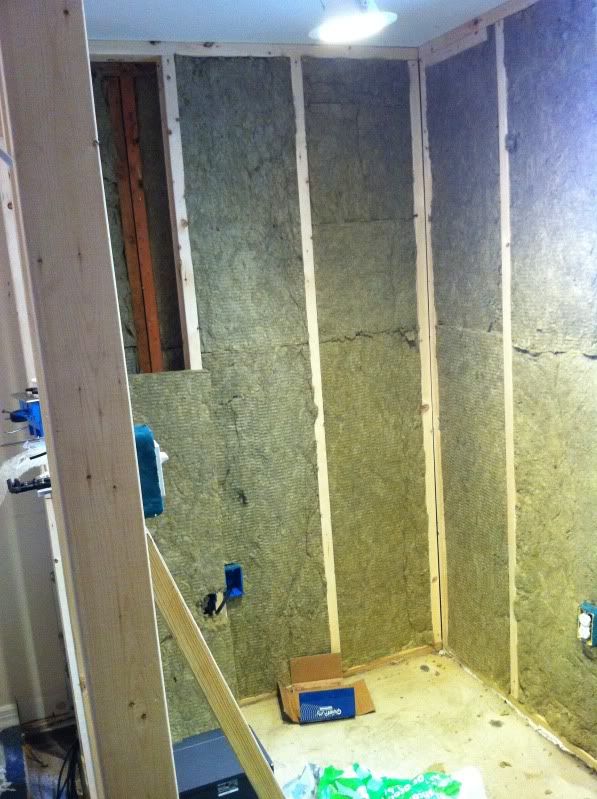
__________________
www.HellfireBeats.com UAD 2 Apollo Quad w/Thunderbolt 3, UAD 2 Satellite Octo TB3, UAD 2 Octo PCIe, Avid S1, Neve R6 500 Chasis, Neve Portico 511, Neve Portico 551, Dangerous DBox+, Focal Trio6 Be, Neumann TLM49, Akai MPC 2000XL, Akai MPC X, Mackie 1202VLZ Pro, Akai Advance 61 Pro Tools 2021.12 Mac Pro 7,1 2019, 8 Core, 48GB RAM - MacOS 11.6.2 16" MacBook Pro 2021, M1 Pro, 16GB RAM - MacOS 12.1 27" iMac, Late-2012, 3.4GHz i7, 24GB RAM - MacOS 10.15 
|
|
#2
04-13-2011, 04:42 PM
|
||||
|
||||
|
That is some good stuff. Keep us posted. What connectors are you going to use for the XLRs and TRS?
__________________
www.M-ManLA.com www.facebook.com/MManLA www.soundcloud.com/m-manla Pro Tools 12, Sibelius First 7/Presonus Studio 192/Windows 10 Pro
|
|
#3
04-13-2011, 05:37 PM
|
|||
|
|||
|
Quote:
As for the TRS, I got some Neutrik NP3C-B's. And I also have a Shure 515SBG-18XF Gooseneck Push-To-Talk Mic. My plan is a little complicated but well thought out, and with the 003 this it's the only way I could think to achieve this without buying another piece of expensive hardware. My plan is to allow the vocalist full control over their headphone mix; meaning mic monitor gain, music monitor gain, and overall headphone gain without having to ask me to adjust it til they feel it's perfect. To accomplish this, I also purchased a cheap Behringer XENYX 502 mixer which has one stereo and one mono input. Since the 003 has a bunch of outputs that I don't use, I figured I'll take advantage of them this way. I'll connect outs 1 & 2 to the stereo in of the Xenyx and bus all the instruments to that channel. Then send output 3 to the mono in of the Xenyx and bus a vocal aux to that channel. The talk back mic will come into my 003's aux input via my mackie vlz, press the "aux to 7/8" button", set up an aux with input 7 as the in and output's 1 & 2 as the outs and send my talkback out the same chain as the instruments, or I can send it out to their mic monitor. Probably sounds really complicated, but it's easy to set up and didn't cost a lot. So that's the plan for that!
__________________
www.HellfireBeats.com UAD 2 Apollo Quad w/Thunderbolt 3, UAD 2 Satellite Octo TB3, UAD 2 Octo PCIe, Avid S1, Neve R6 500 Chasis, Neve Portico 511, Neve Portico 551, Dangerous DBox+, Focal Trio6 Be, Neumann TLM49, Akai MPC 2000XL, Akai MPC X, Mackie 1202VLZ Pro, Akai Advance 61 Pro Tools 2021.12 Mac Pro 7,1 2019, 8 Core, 48GB RAM - MacOS 11.6.2 16" MacBook Pro 2021, M1 Pro, 16GB RAM - MacOS 12.1 27" iMac, Late-2012, 3.4GHz i7, 24GB RAM - MacOS 10.15
|
|
#4
04-13-2011, 05:38 PM
|
|||
|
|||
|
Yes, please keep this updated..
We're buying a new house soon and I will put a 'live' room, vocal booth and mix room out back and work from home... I'll do the labor myself but it's nice to watch what others have gone through to, hopefully, avoid some mistakes.. (and make brand new ones)
__________________
Here I am, after time not long... and thankful for the break, What I found when I got there, was that I couldn't stay away! Hobo Shave!
|
|
#5
04-13-2011, 07:54 PM
|
|||
|
|||
|
Quote:
__________________
www.HellfireBeats.com UAD 2 Apollo Quad w/Thunderbolt 3, UAD 2 Satellite Octo TB3, UAD 2 Octo PCIe, Avid S1, Neve R6 500 Chasis, Neve Portico 511, Neve Portico 551, Dangerous DBox+, Focal Trio6 Be, Neumann TLM49, Akai MPC 2000XL, Akai MPC X, Mackie 1202VLZ Pro, Akai Advance 61 Pro Tools 2021.12 Mac Pro 7,1 2019, 8 Core, 48GB RAM - MacOS 11.6.2 16" MacBook Pro 2021, M1 Pro, 16GB RAM - MacOS 12.1 27" iMac, Late-2012, 3.4GHz i7, 24GB RAM - MacOS 10.15
|
|
#6
04-13-2011, 08:42 PM
|
|||
|
|||
|
Enjoying the progress!
__________________
Scott Formerly Hobo Wan Kenobi Core 2 Specs Page ASUS P6T6 Revolution | i7 930 | 12GB OCZ DDR3 1600 7-7-7-20 | PTLE 10 | CPTK | 003 | Presonus D8 | 11Rack | Alesis AI3 | Presonus HP60 | Mercury + Studio Classics | Sound Toys | MasseyPack | Axiom61 | MAudio Keystation Pro 88
|
|
#7
04-14-2011, 01:36 PM
|
|||
|
|||
|
Cool construction diary!! Your termite problem reminded me of a buddy who bought a fixer-upper as an "investment" property. He thought it had one bad bit of flooring and back wall, started doing demolition work and like you just found more problems. He ended up stripping it down to the foundation and starting from there!!! Glad it doesn't look like you had to that far!!!
")
__________________
"Sometimes having limits keeps you sane "- Albee1952
|
|
#8
04-15-2011, 01:37 AM
|
||||
|
||||
|
Quote:
__________________
www.M-ManLA.com www.facebook.com/MManLA www.soundcloud.com/m-manla Pro Tools 12, Sibelius First 7/Presonus Studio 192/Windows 10 Pro
|
|
#9
04-15-2011, 01:38 AM
|
||||
|
||||
|
I'm soo into this post I'm waiting for day five. Maybe if I go to sleep and wake up it will magically appear...
__________________
www.M-ManLA.com www.facebook.com/MManLA www.soundcloud.com/m-manla Pro Tools 12, Sibelius First 7/Presonus Studio 192/Windows 10 Pro
|
|
#10
04-15-2011, 02:06 PM
|
|||
|
|||
|
Couldn't add any more characters to the first post. Here's Day 5 and 6!
Day 5 Nothing crazy today. Today I started off by labling my wires and prepping the gangwall boxes for the front outer wall. Then filled more insulation on the inner back wall and some more on the outer rear wall. The rest of the outer rear wall will get insulated from the outside after we remove the window. Also did a test placement of the mic and found that it's more roomy than I anticipated. So the vocalist will be pretty comfortable and shouldn't feel too cramped in there. Also did a sloppy sharpie layout of where my ceiling acoustic panels will go. 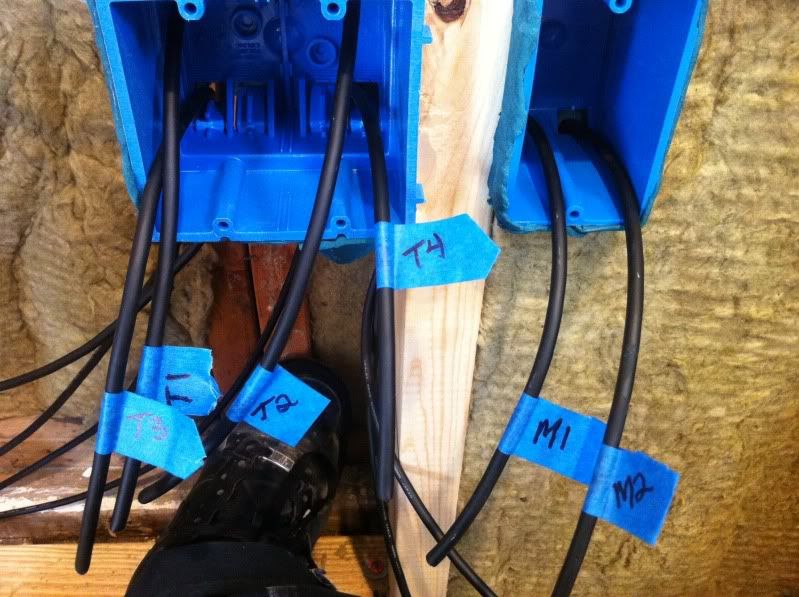 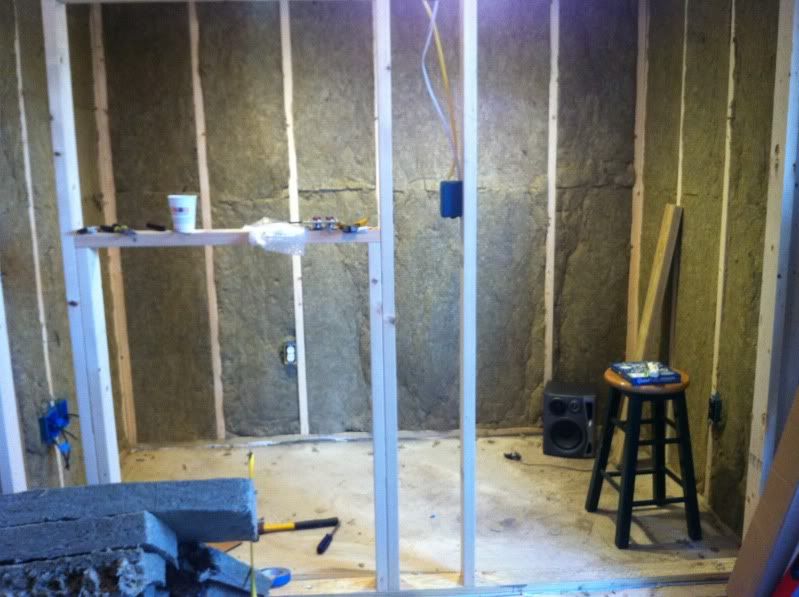 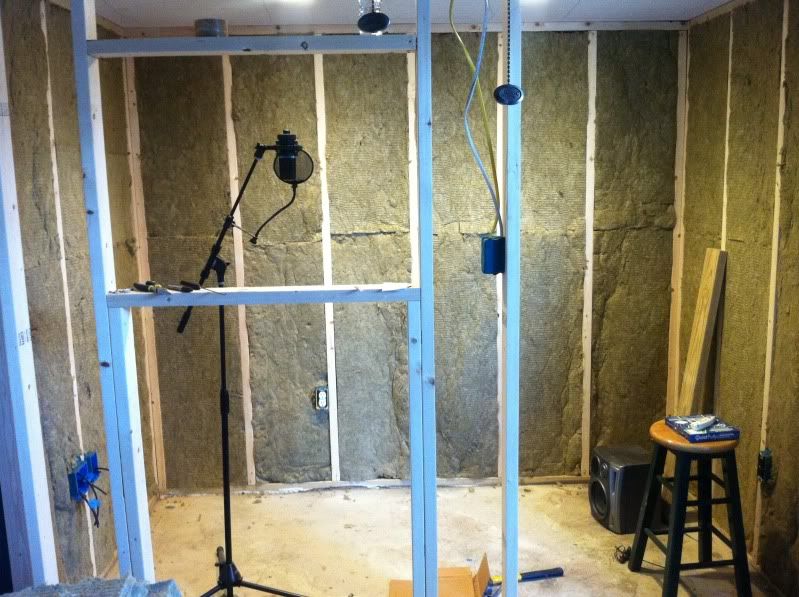 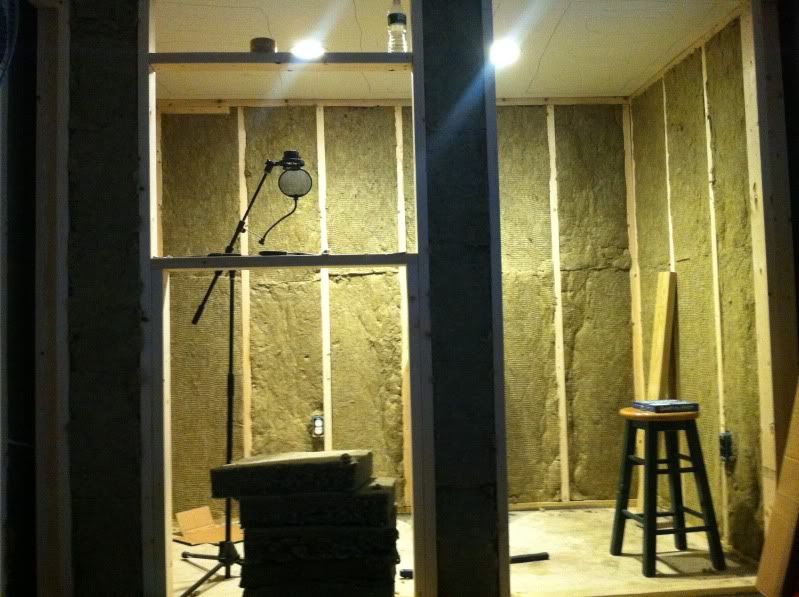 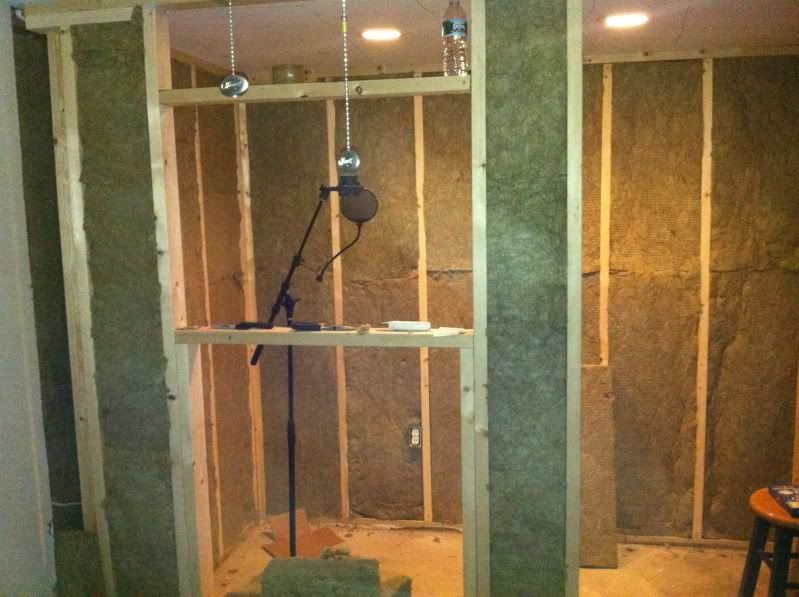 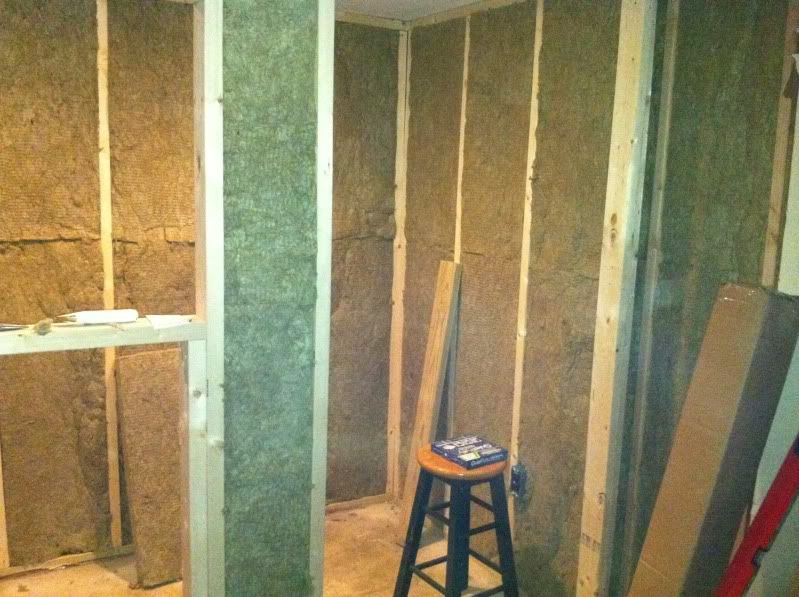 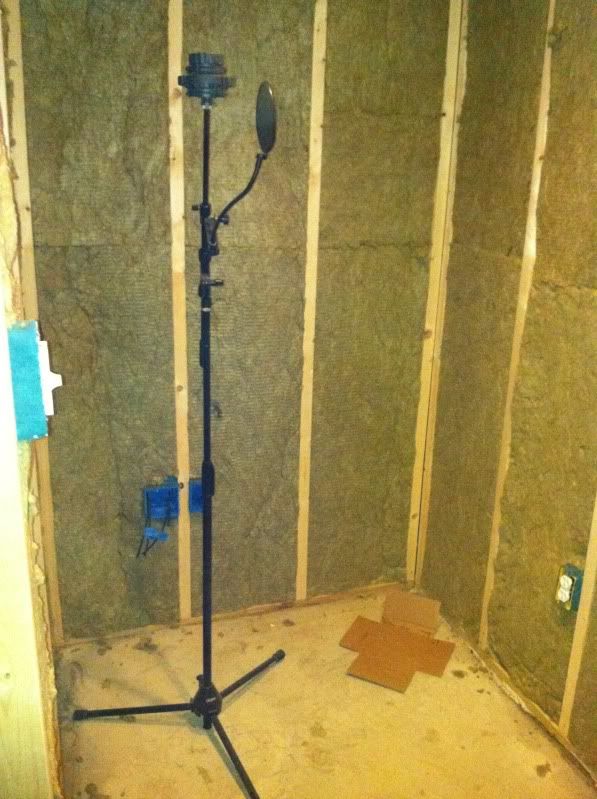 Day 6 Today I finally tackled what I've been stalling on because I knew it would be a PITA; and it was. Again, nothing major today. Just started off covering my recessed light housings with QuitePutty then filled the rest of the ceiling in with roxul. The angle of the roof makes the far corner a bitch to get to. It's hot as hell. There are fibers everywhere. I'm choking like a chain smoker. And the beams and plywood sheet are killing my knees. It was brutal but it's finally done. Hopefully I wont get any bad sound leakage/transfer through the ceiling or light housings! And hopefully these light housings don't catch fire (even though they're IC Rated)! :shock: :lol: Insulation's not the neatest but it'll have to do! :lol: Also, I picked out and purchased my flooring. It's tongue and groove laminate in "Estate Cherry" color! 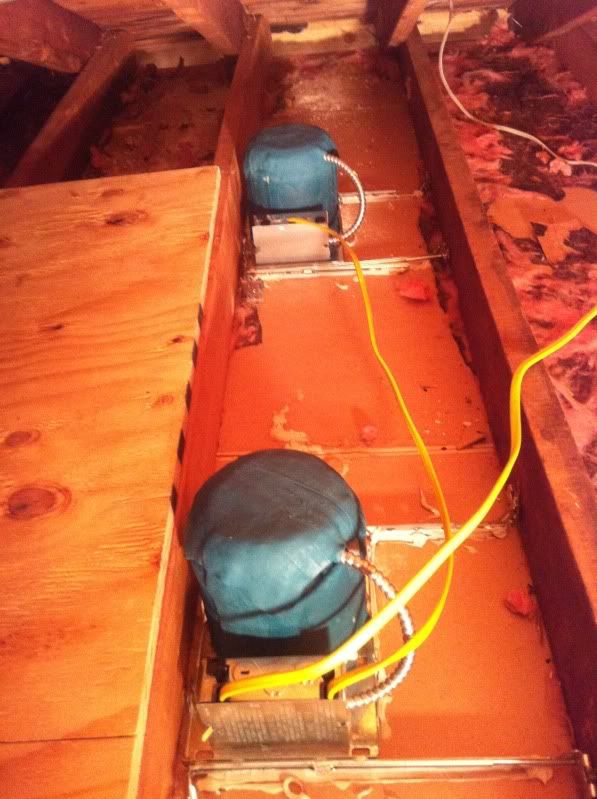 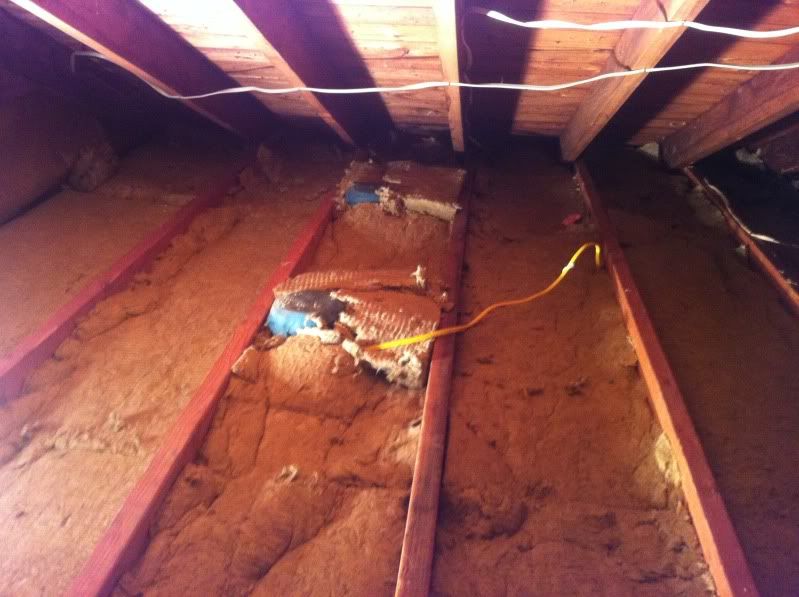 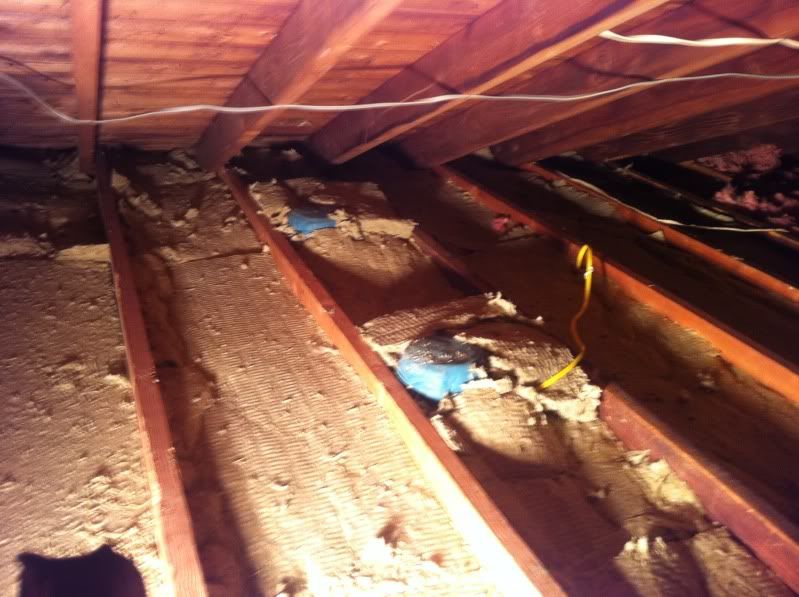 That's it for now! Tomorrow will be another major work day. We will be removing the window, framing the front wall, sheetrocking, framing the booth glass, and possibly mounting the booth glass! Day 7 Today was productive. However, due to the crazy amount of rain, we had to end early. Started out the morning by picking up as much drywall as my brother-in-laws truck could hold, which happened to be just enough to do the first full layer of the booth interior. First we framed the front outer wall and I did most of the insulation. Then we tackled the ceiling, which was just doubling up the pre-existing drywall with a full sheet and slopped on 2 tubes of Green Glue. Also, we adjusted the light mounts to accomodate the double layered drywall. Then we mounted the first full interior drywall layer. We tried to get the screws as lined up as possible, but it's not easy as it seems. So I took pics of all the panels to see where all the screws are when we mount the second layer. Also used some USG acoustical sealant on the face of the studs before mounting the drywall. We also tried as best as possible not to let the adjacent sheets touch. For the most part we did it, but there's about 3 areas touching that need to be trimmed. 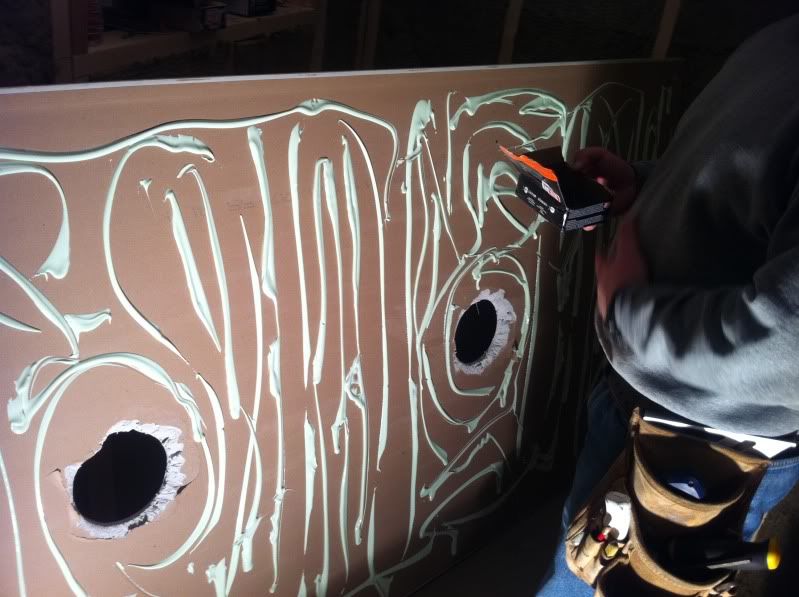 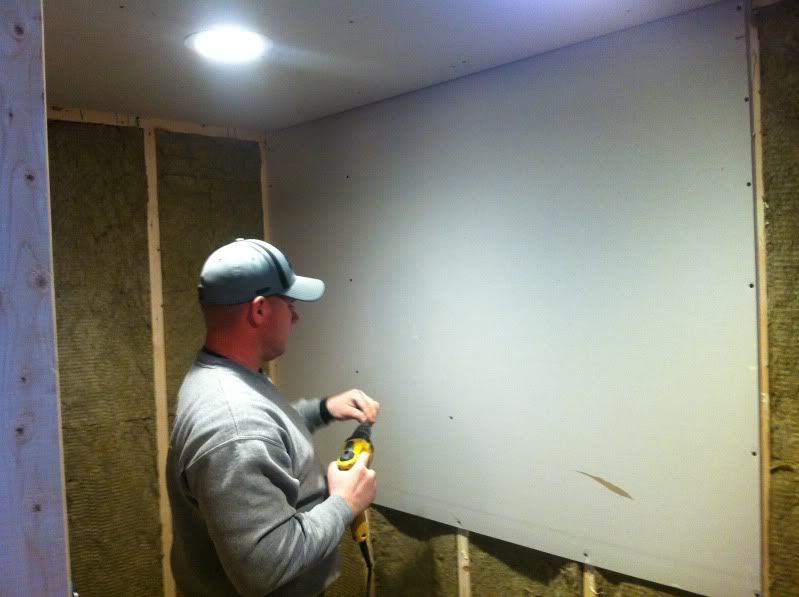 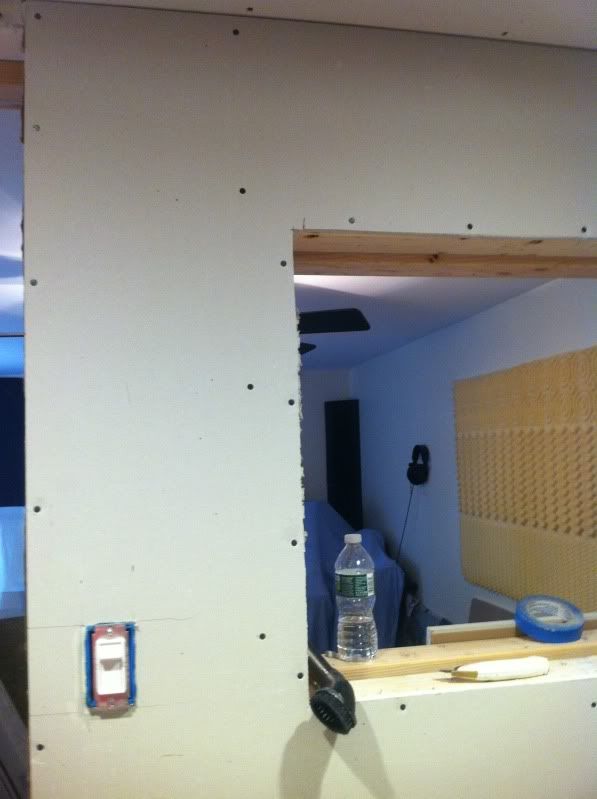 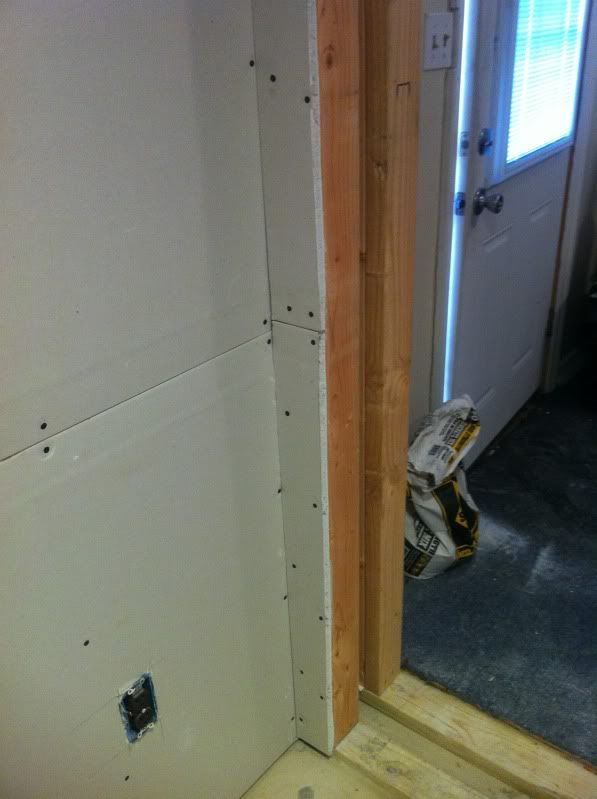 Day 8 Started this morning by finishing off rest of the front wall insulation using scraps instead of opening a fresh bag. Then I decided to practice my mudding and taping on the first layer, since I've never done it before. So yeah, it's sloppy, I know. But it's mainly due to inexperience, which cause me to try to do it all with one size compound knife. I also didn't know the joint tape wasn't adhesive and that the mud holds it on. I thought you mud the just, stick the tape on, then mud over the tape and bevel. So I'll have to sand some off and redo it with the tape. Screw heads are easy though. Also have to get a 3" and 12" knife and one of those nifty corner knives. Final layer will be done proper since I've learned how to do it now! Later in the day my cousin helped me pick up some more drywall and we did the first layer of the front outer wall. 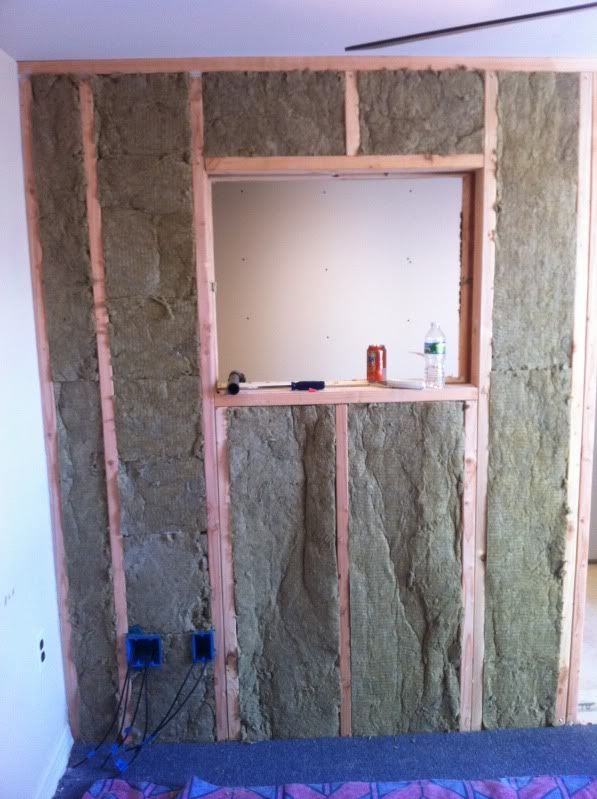 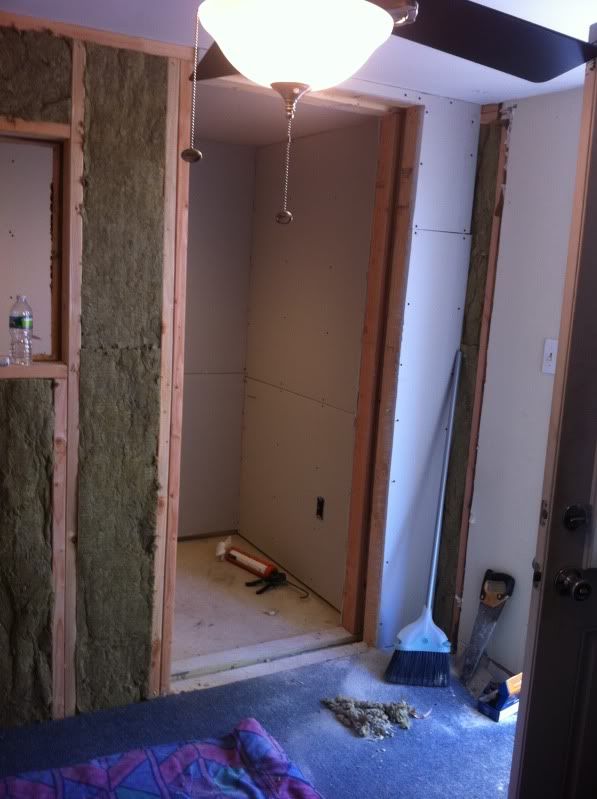 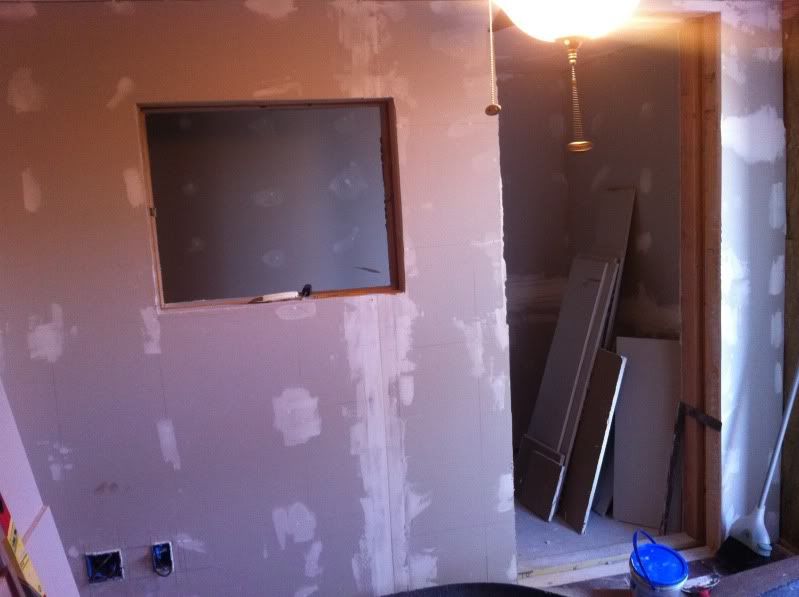 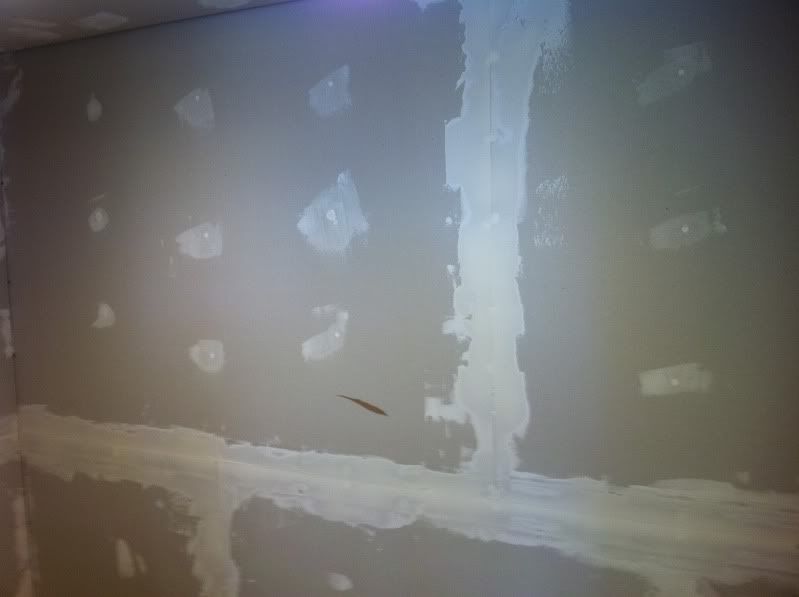 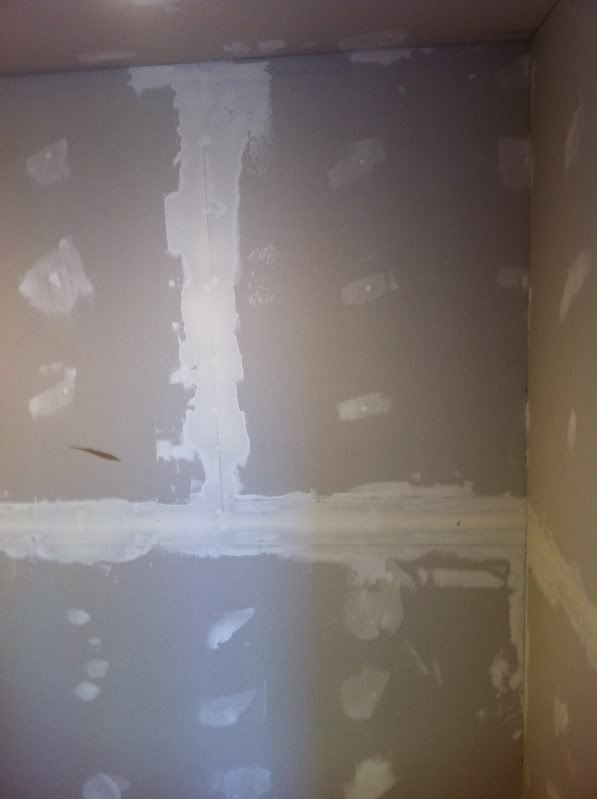 Day 9: Today, I mounted the second layer of drywall on all inner and outer walls. I also used 2 tubes of GreenGlue per 4x8 sheet. And I used some old cd's to space the drywall from the floor. 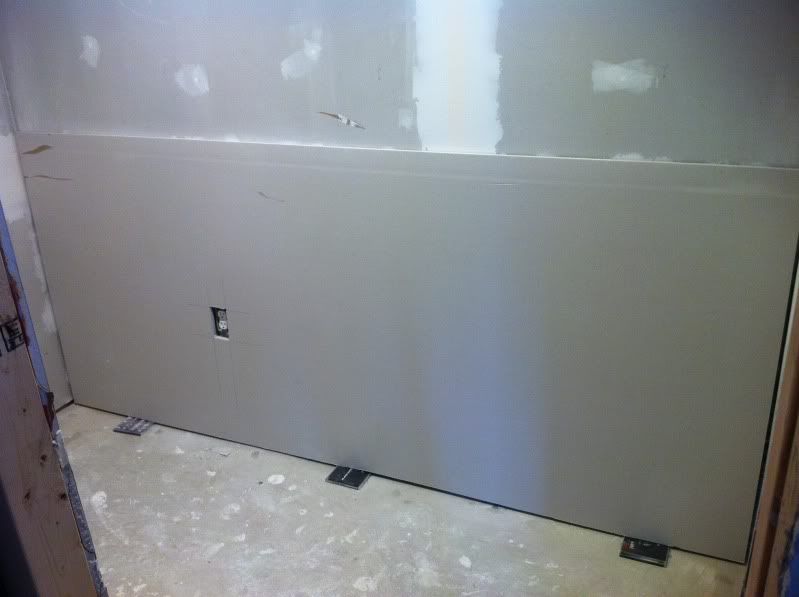 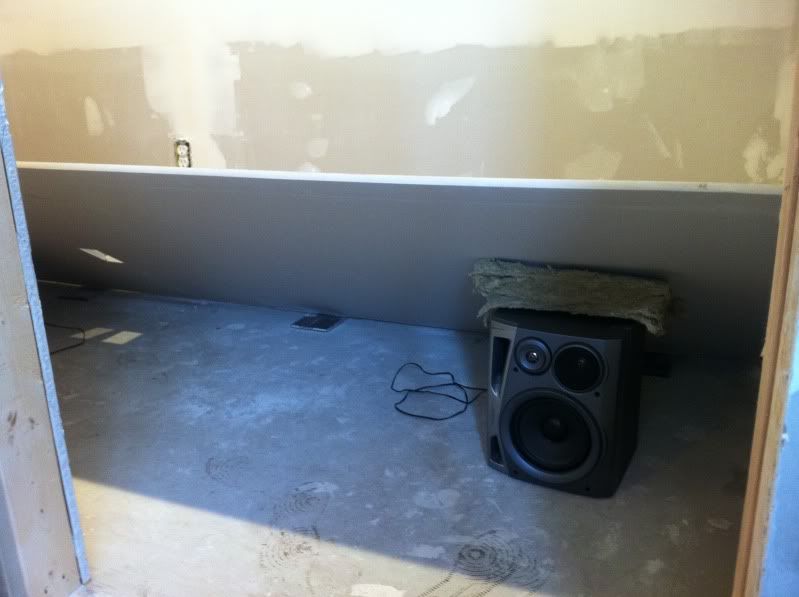 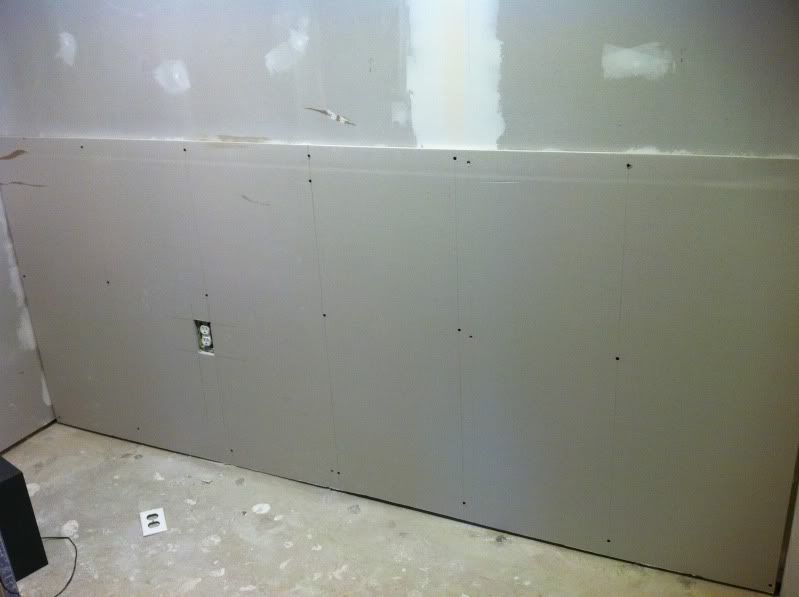 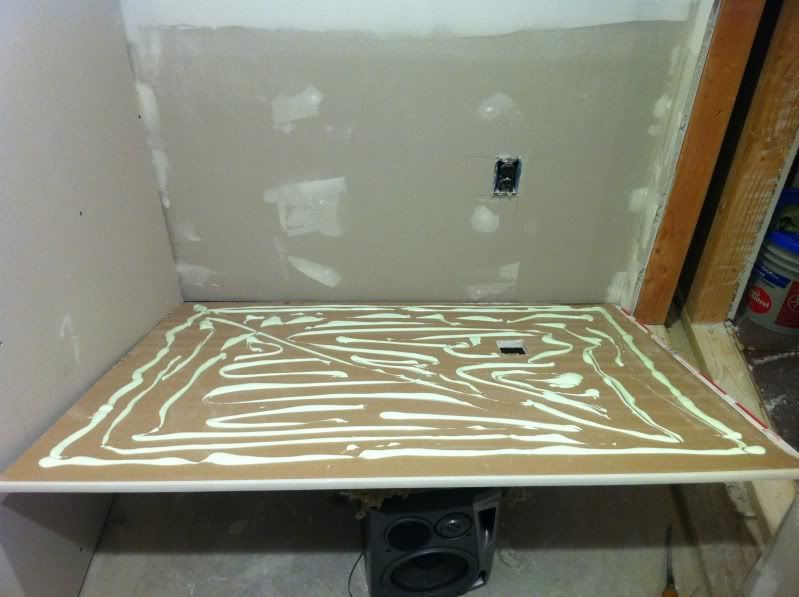 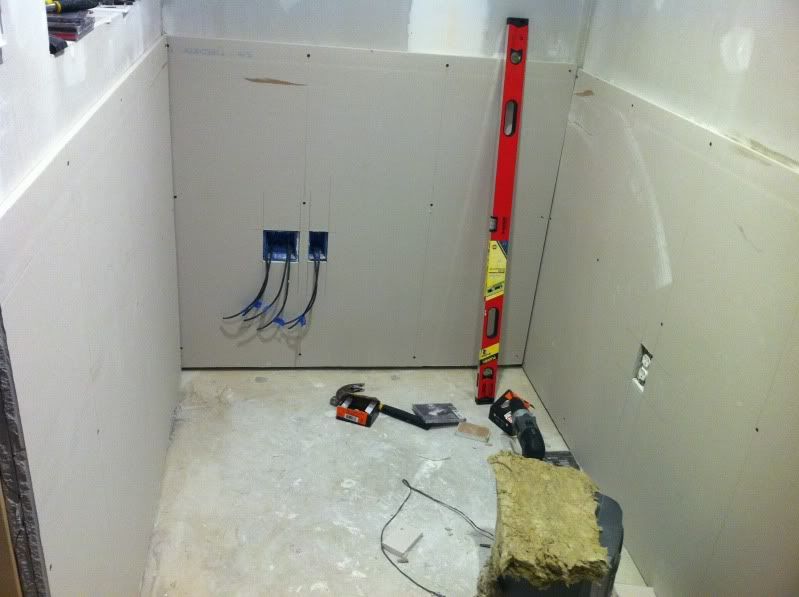 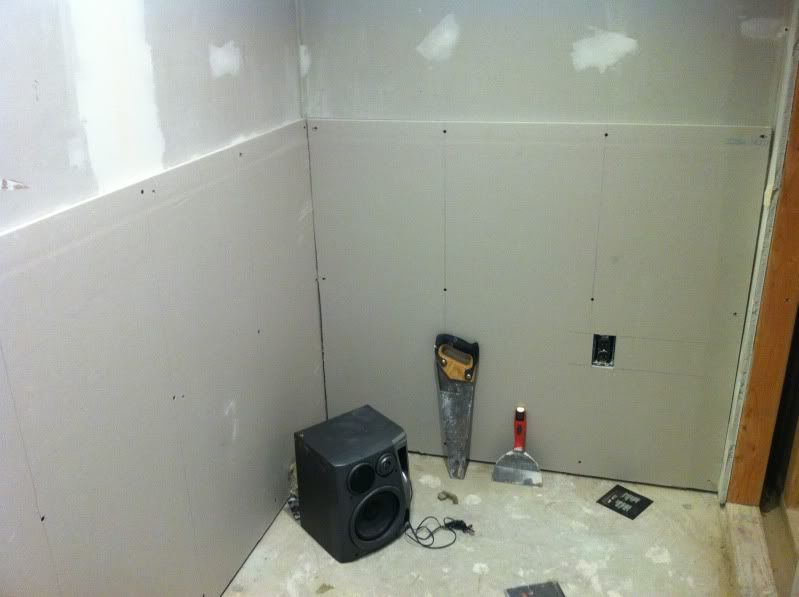 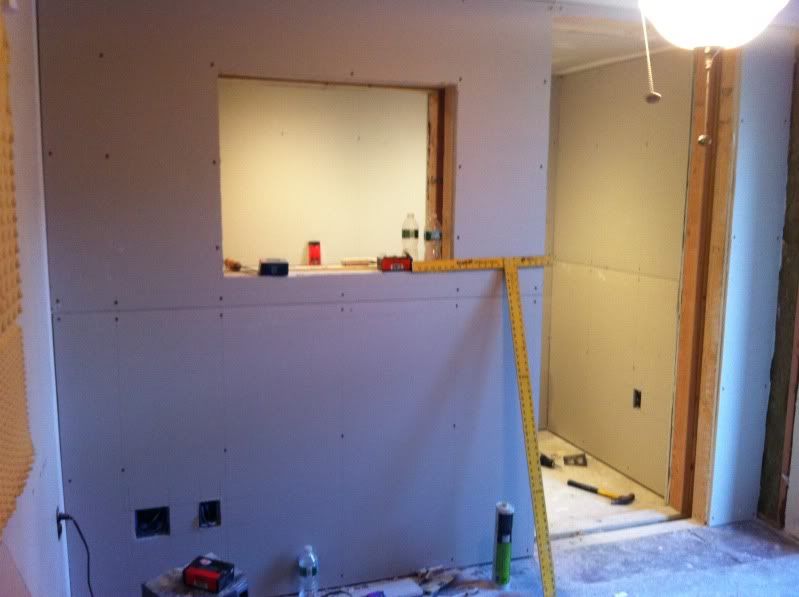 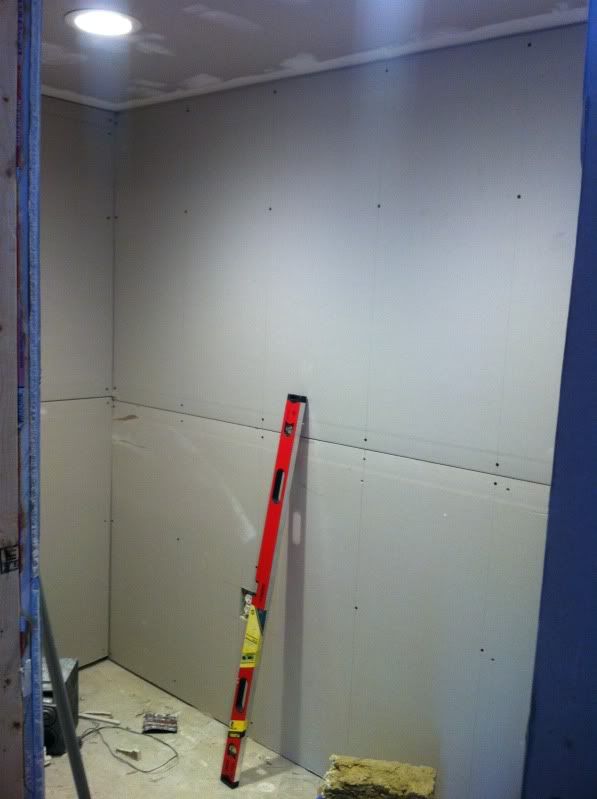 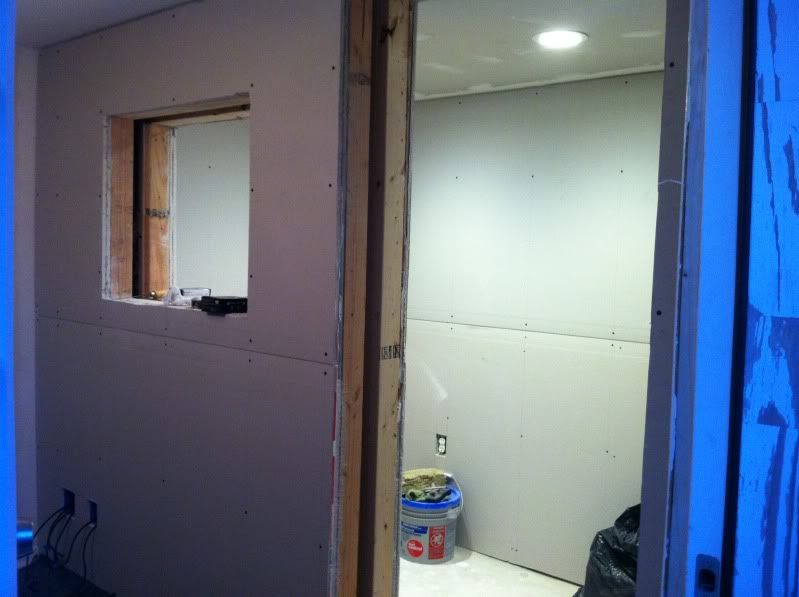 Day 10-13: Spent these many days mudding taping and sanding and prepping for paint. Father-in-law helped me with the first coat and tape. Then went on vaca for 5 days and finished the second coat and sanding. Didn't come out perfect, but it was my first time. The spots that will be seen are really good though. It's just some of the upper corners that have some imperfections. No big deal. Booth ain't going to a beauty contest. 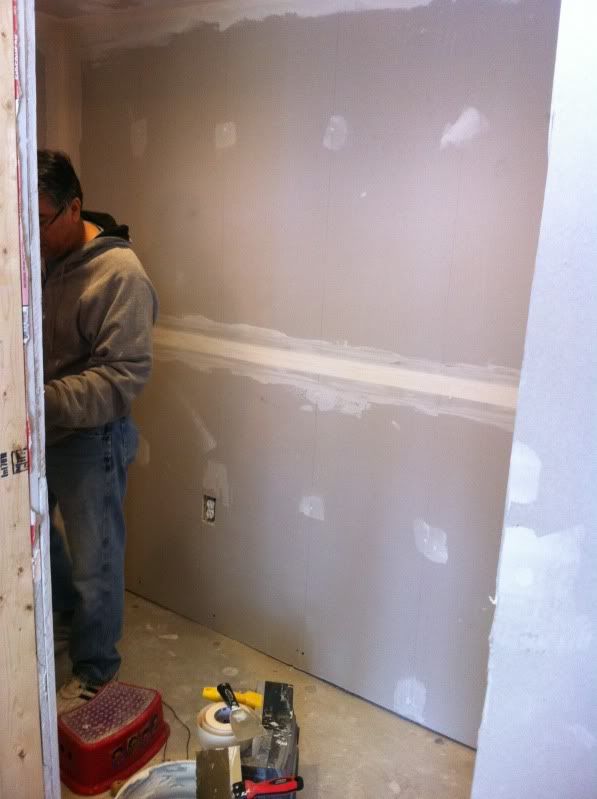 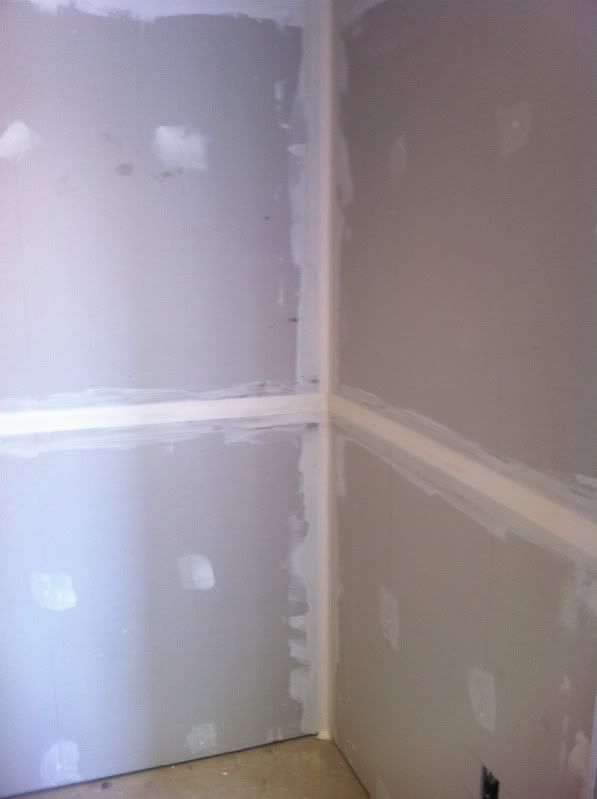 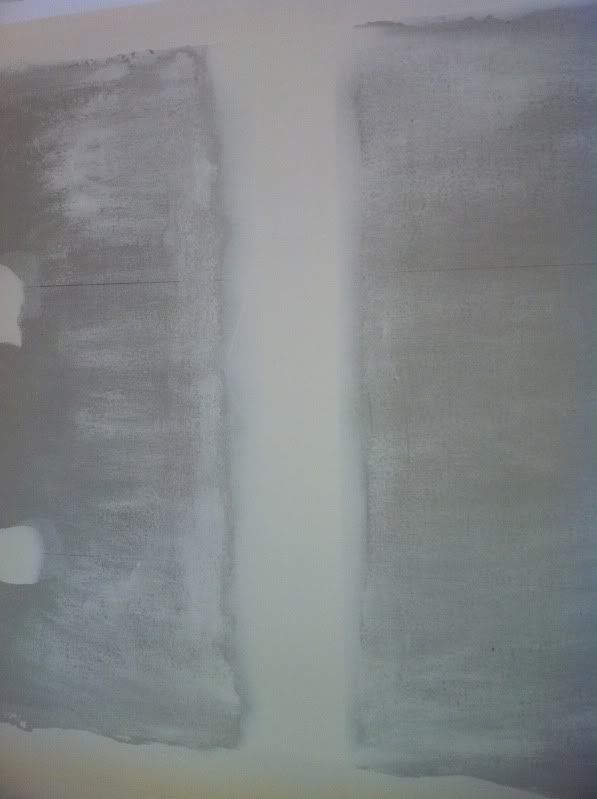 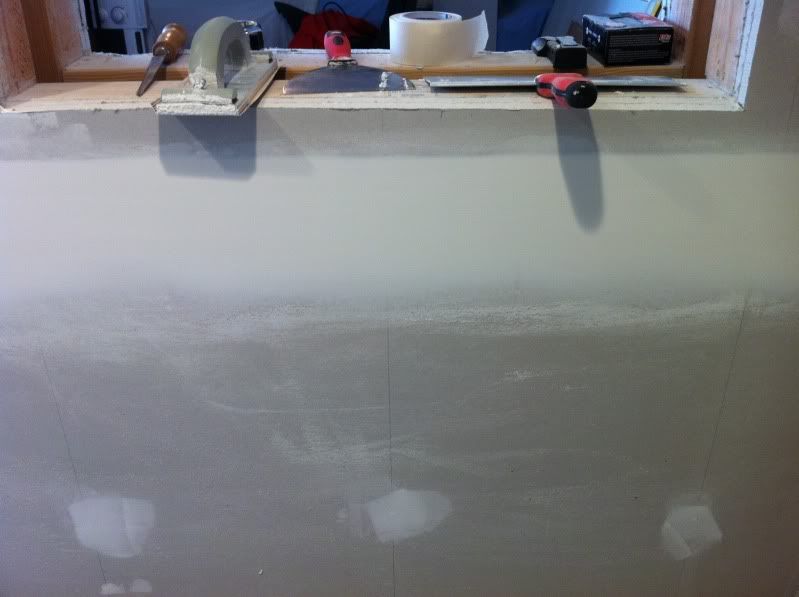 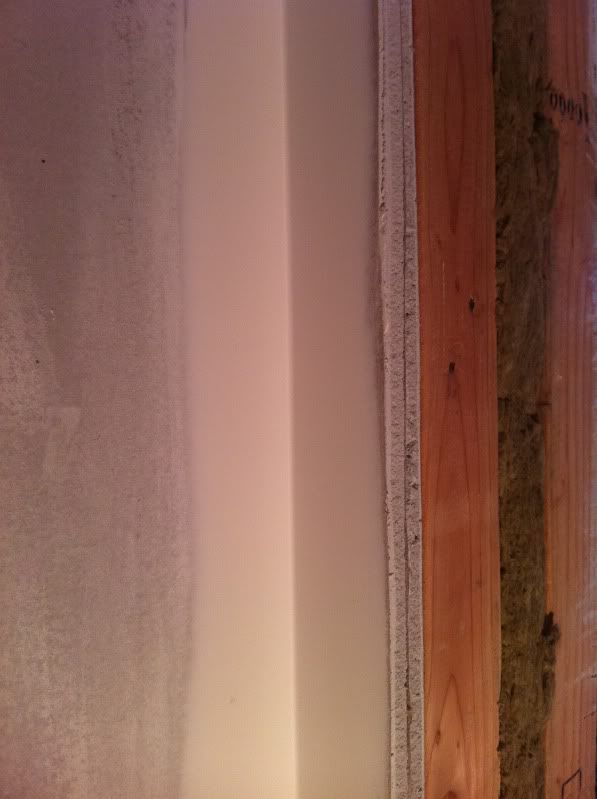 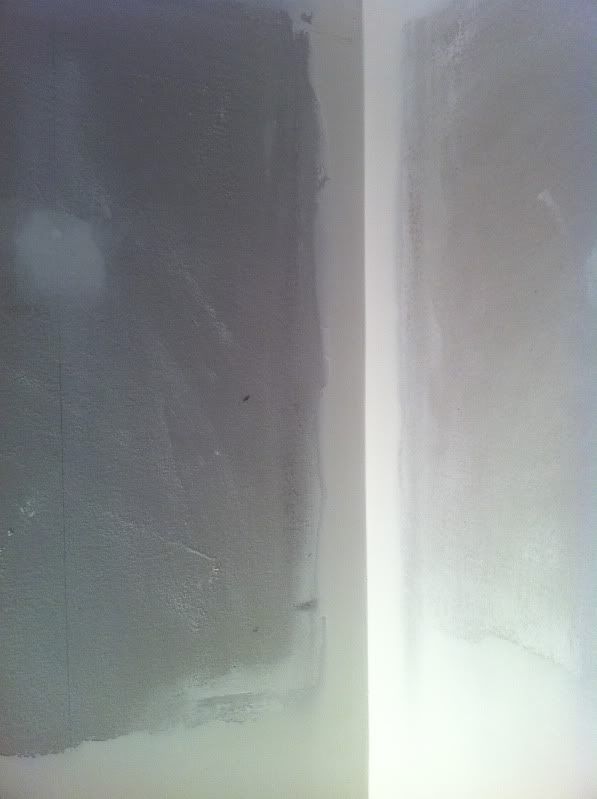 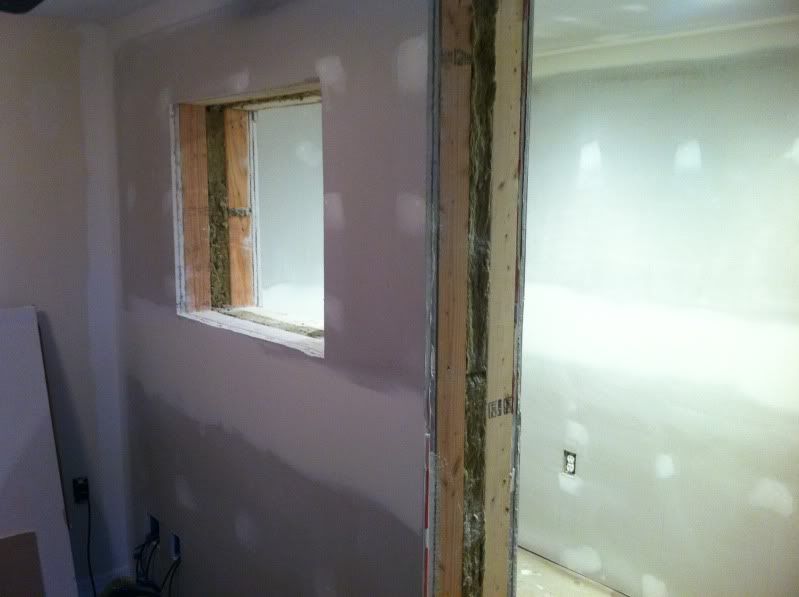 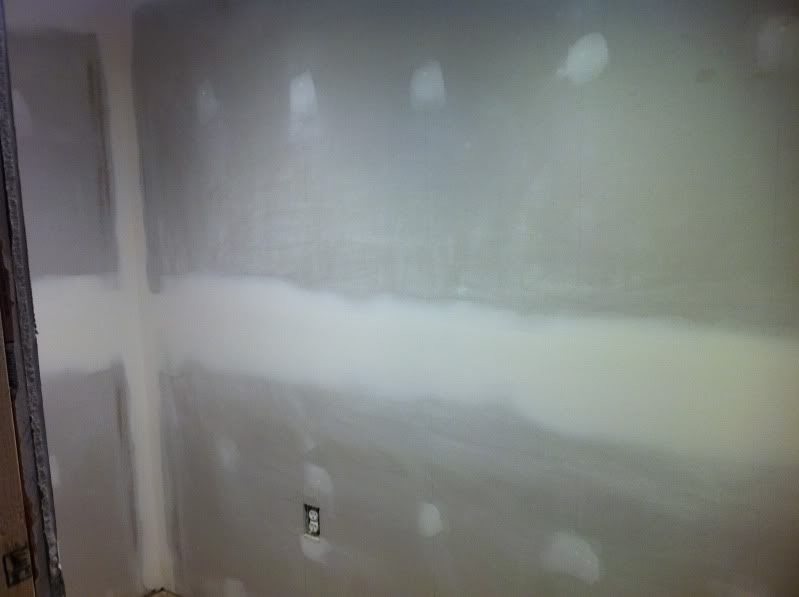 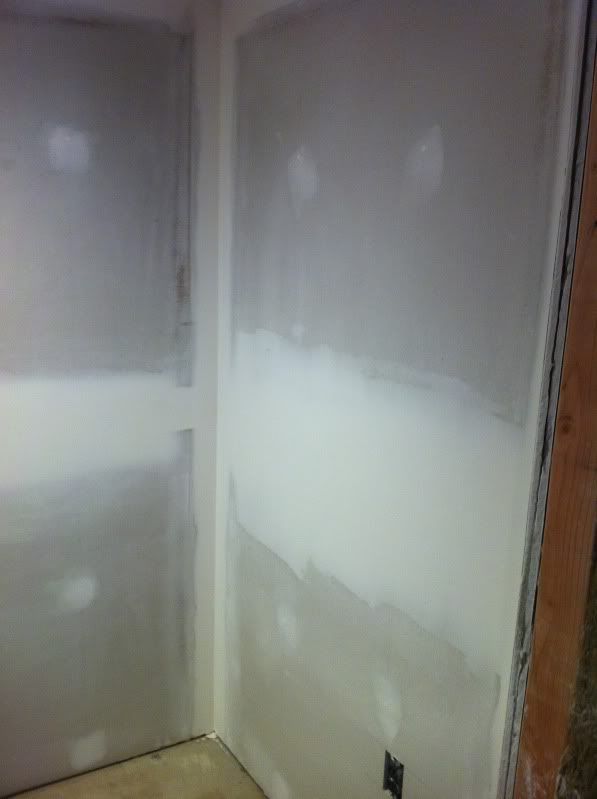 Day 14-15: Paint days. My cousin helped me these two days. Started off with the black ceiling. Then did the white walls. And finish with the red walls. This came out pretty good. Just gotta do a few touch ups in the corners where the paint got under the tape. Also, framed out the windows and window ledge. 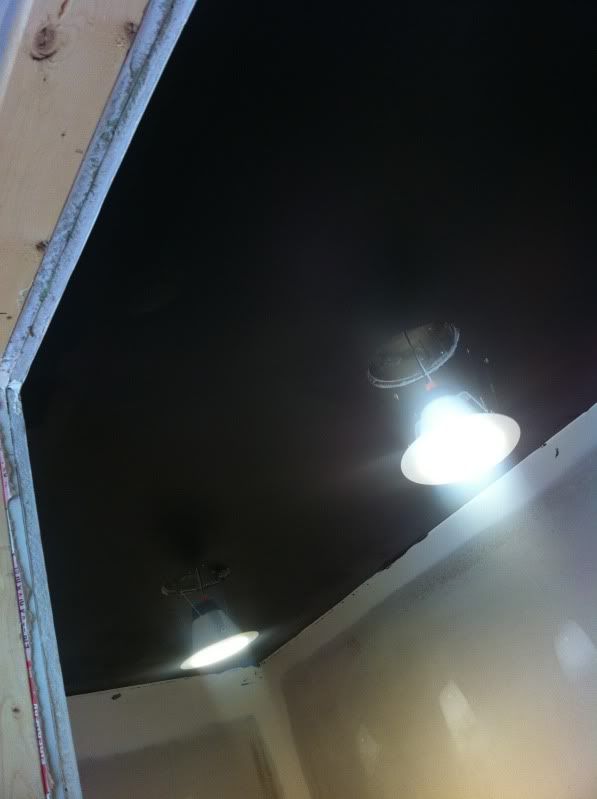 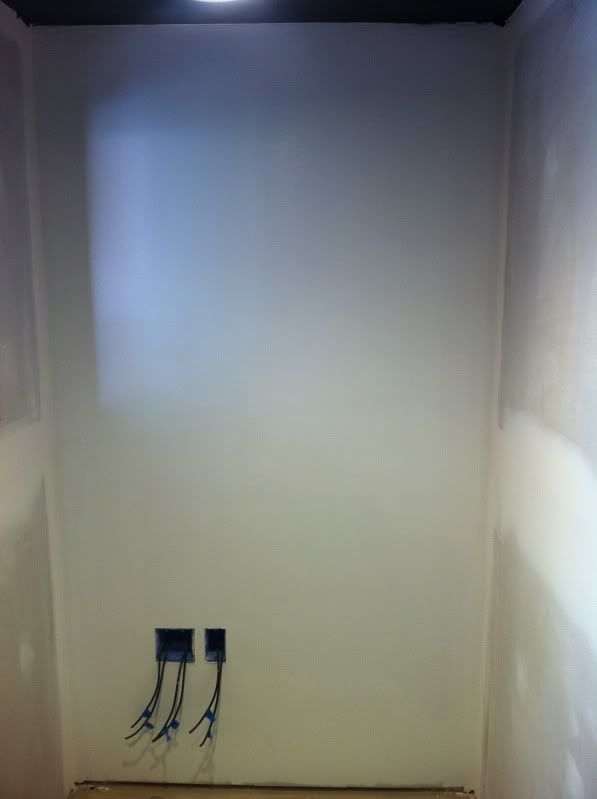 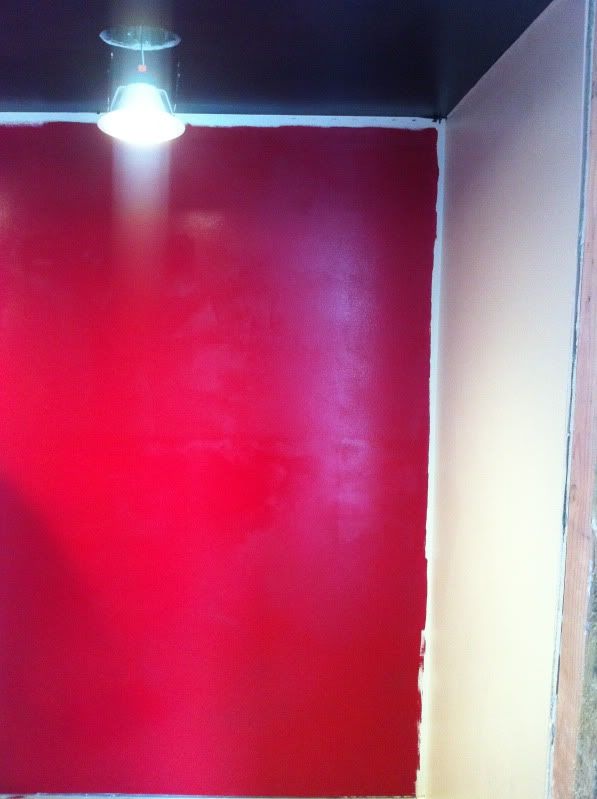 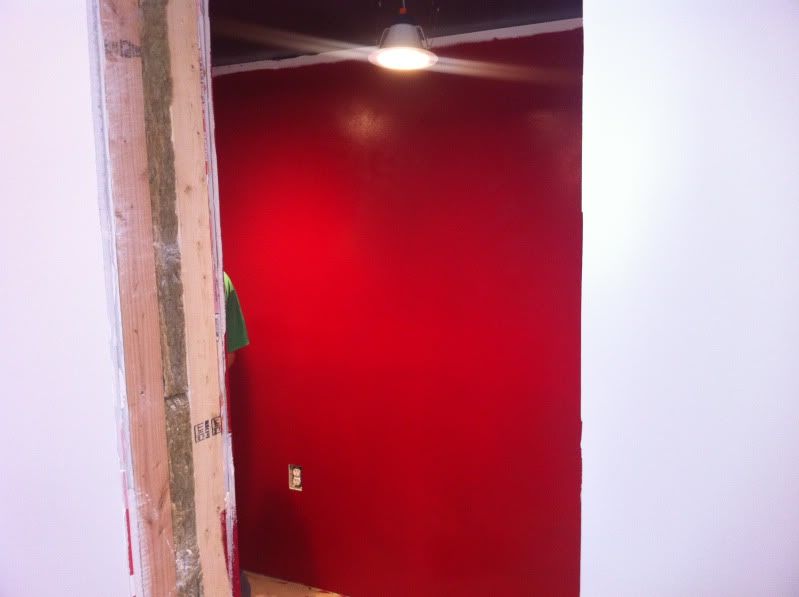 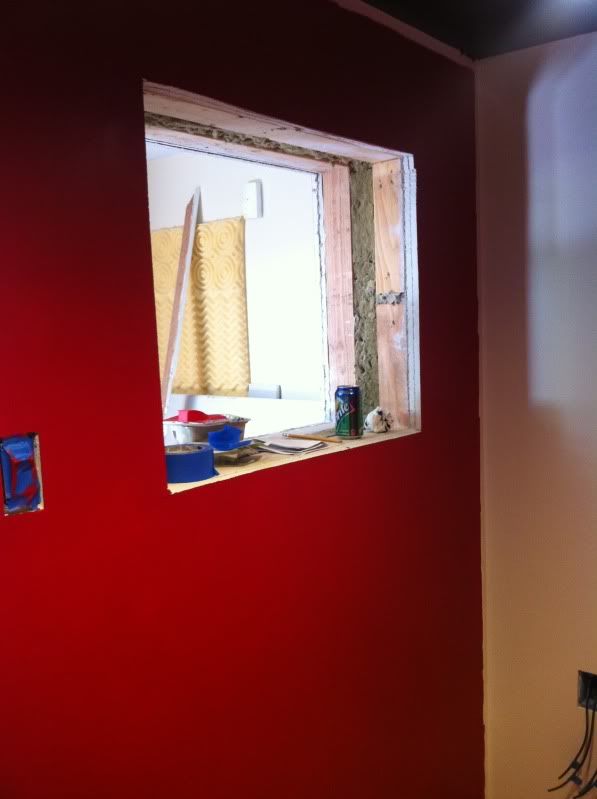 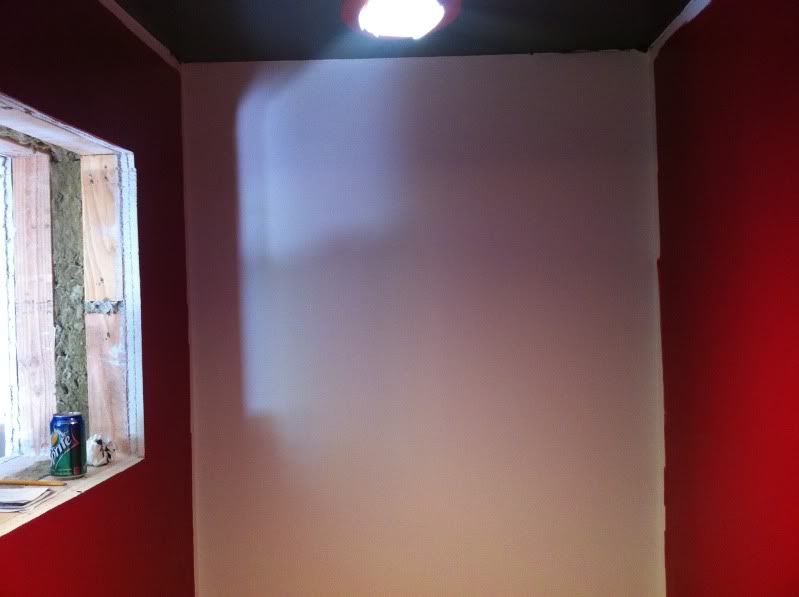 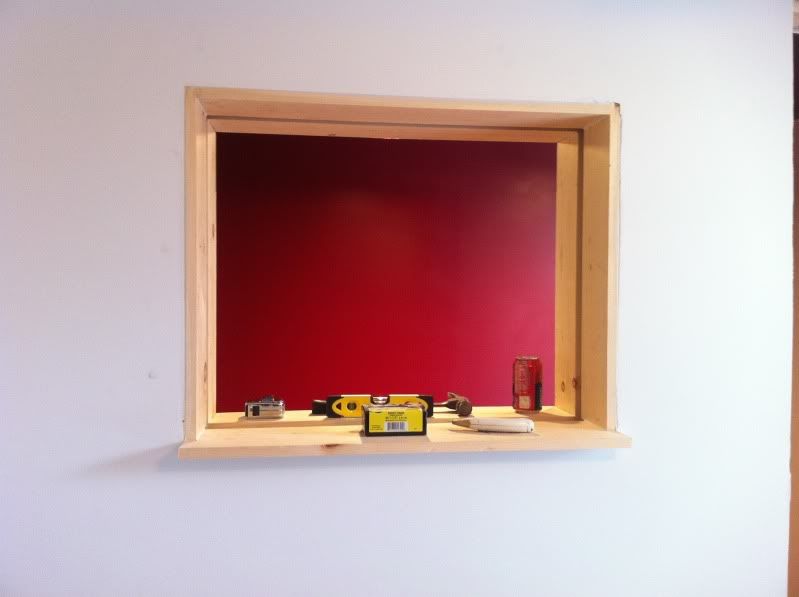  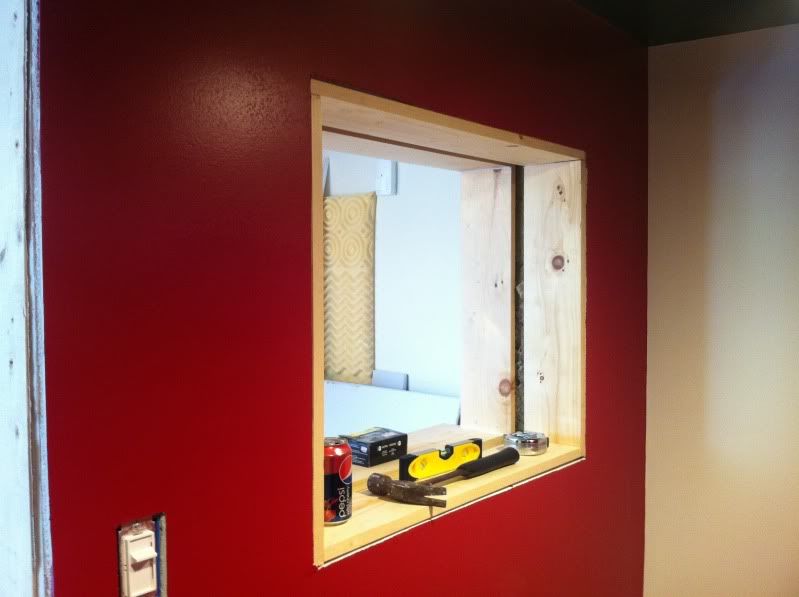  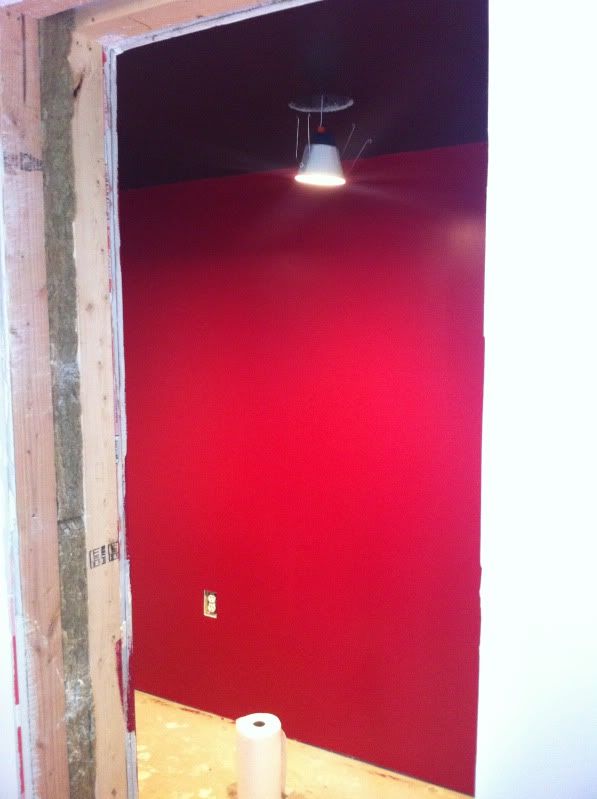 Day 16: Another fun day in build land. Today I got cracking on the window stops for the glass. Started off sizing up each side out of 1x4 pine and pre fitting them into their spots. 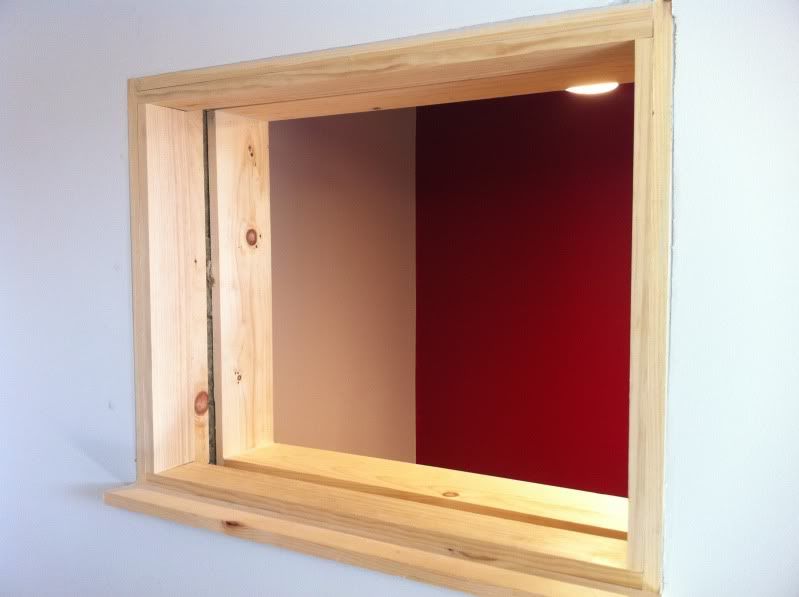  Next, since I wanted to angle both windows downward, I needed to figure out how to rip each piece of 1x4 at accurate, even, and straight cut angles. So Pound gave me an idea from a youtube vid to build a jig to cut straight lines with my circular saw. Luckily, I had some spare plywood leftover from the termite wall replacement and built the jig in 10 minutes on my table saw that my neighbor so kindly gave to me for FREE! :mrgreen: Then, since the pieces were too small to clamp to the jig to cut, I drilled elongated holes in the parts of each piece that will be inside the glass and unseen, which allowed me to screw them to the jig and adjust them to my cutting marks. 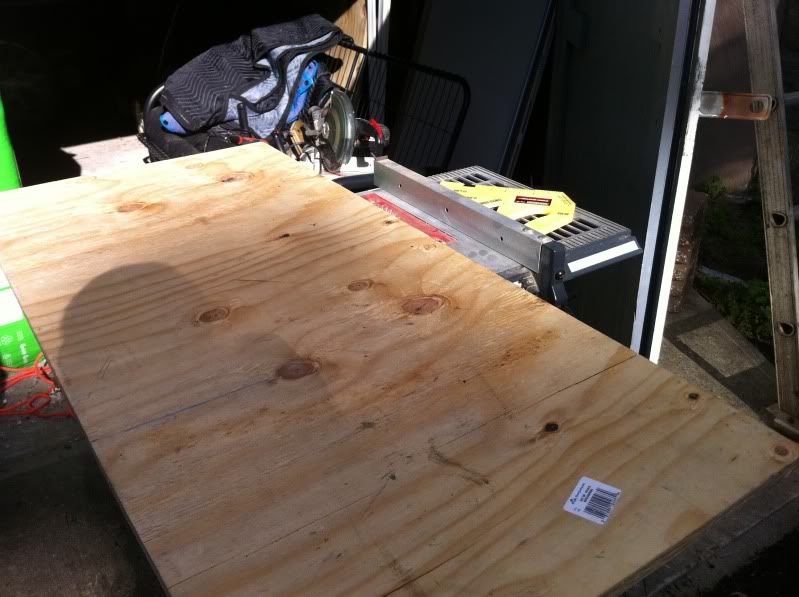 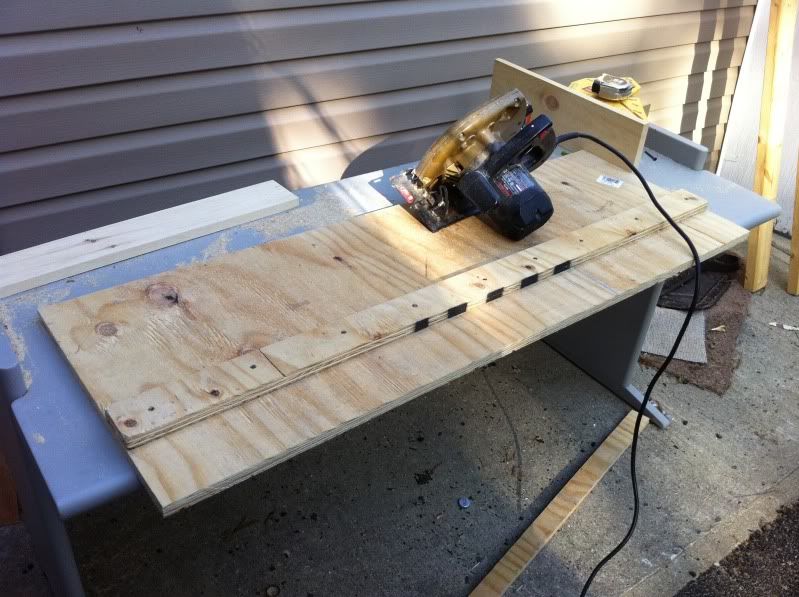 Then I measured and marked how my angles were going to go and cut them. For the top and bottom stops, I made a small bevel with the table saw to match the angle of the side pieces. 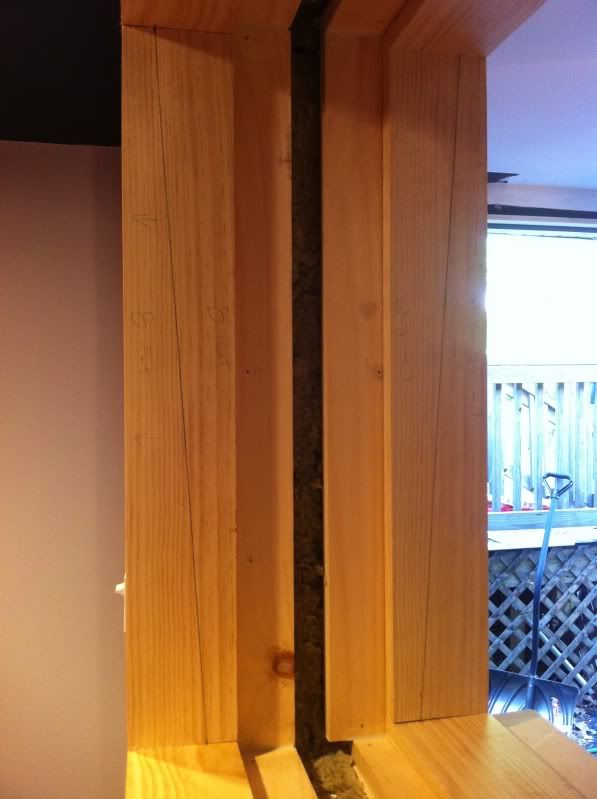 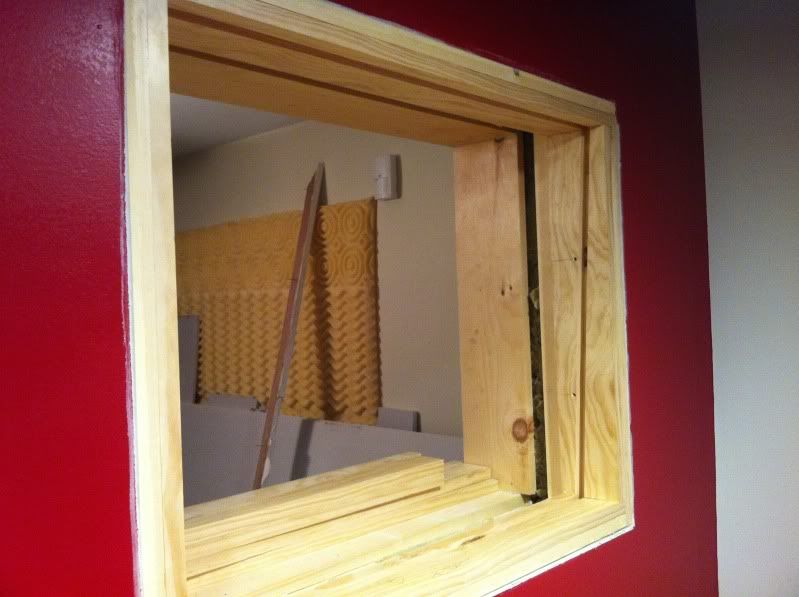 Next, I need to figure out where exactly the inner stops would mount so once the glass was in place, the outer stops would be flush with the window frame and wall surface. And to simulate my 1/8" thick glazing tape, which will be used in the final install, I taped some 1/8" thick neoprene setting blocks to the stops for the glass to rest against. I just hope the 1/8" glazing tape measures out to be actually 1/8". 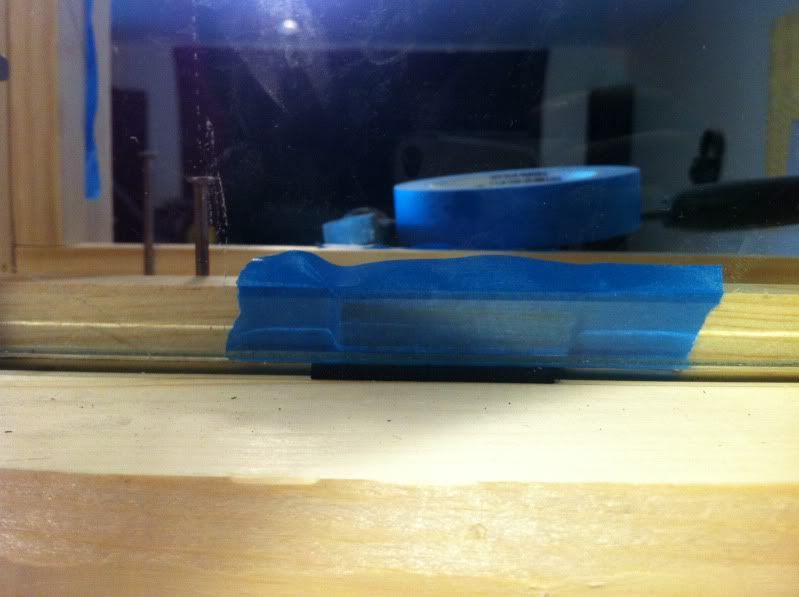 Back to the stop alignments. The first method didn't work so great as I was trying to avoid making holes in the outer stops, which will be seen when finished. I attempted to measure and place nail stops at the point the inner stops were supposed to mount. But this turned out to be very inaccurate and the outer stops didn't line up well like I wanted. 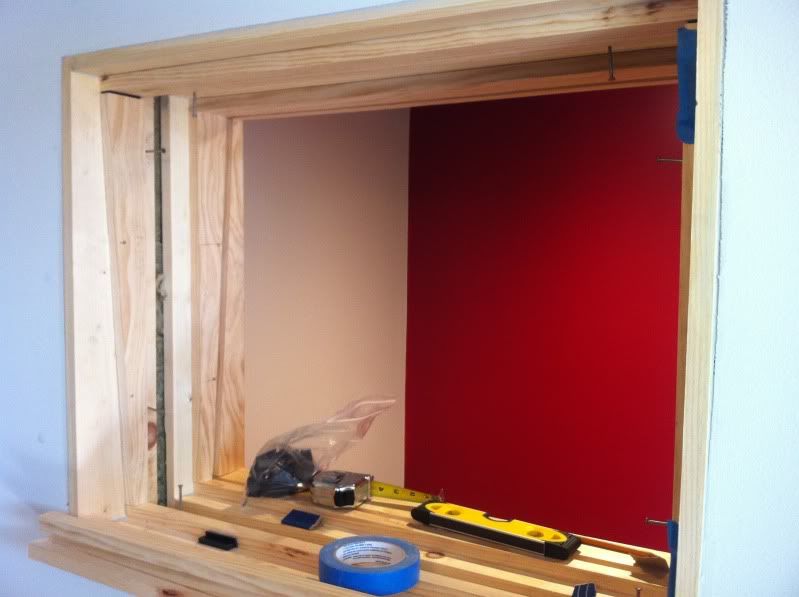  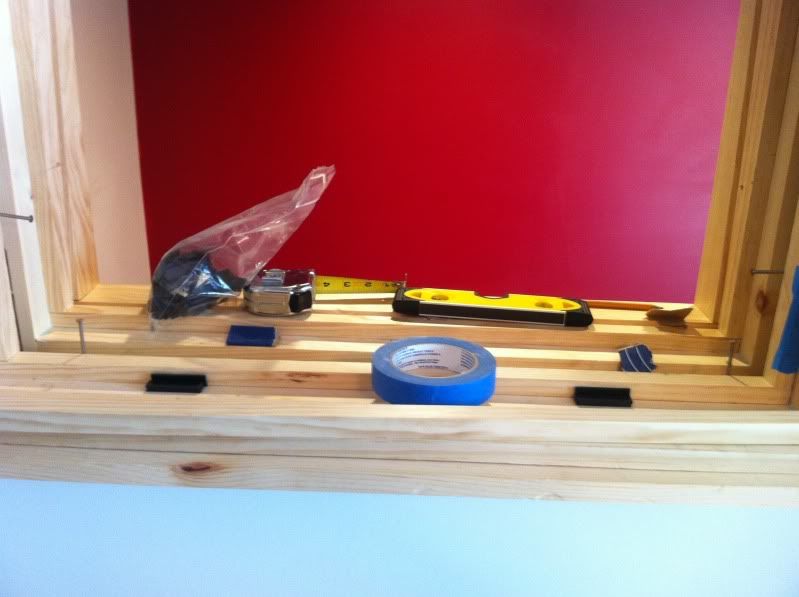 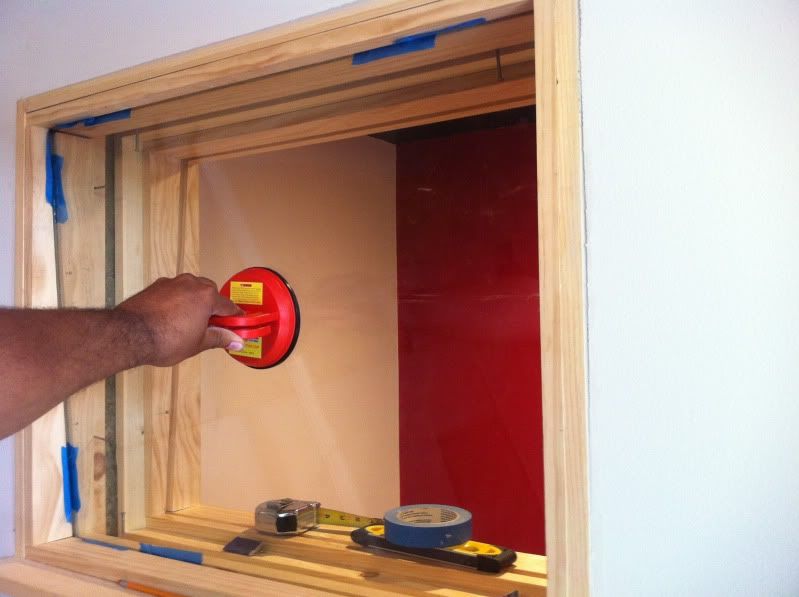 The second method I tried worked great, even though I knew from the beginning it would. But it involved drilling holes into the outer stops which I didn't want to do. But I figured I want the glass to be installed right and that I can just use wood putty or something to fill the holes. So this method involved installing the window from the outside in. I first mounted all the outer stops and got them as flush as possible to the wall surface while keeping the angles between each piece properly aligned. Then for each piece, I drill two small holes through the stop and into the frame and then used wood screws to hold them in place. Once I got all the out stops mounted, I then installed the glass from the other side of the wall and repeated the same mounting steps for the inner stops. And now I have the final mounting position for all the stops of one window, assuming the 1/8" glazing tape doesn't compress too much during the final install. But this test fit method now allows me to tack the inner stops in place with finishing nails and remove the screws. Then I'll remove the outer stops to fill the wood screw holes, paint them, and clean the glass for the final install. So when I go to put the glass back in for good, the outer stops should already be lined up flush. This also allows to do the other window from the outside in as well because I can just put the other window in the opening first and let it rest against the window on the other side that I did first; then mount the outer stops for the second window and pull the second window up against it, remove the first window by unscrewing the outer stops only, and mount the inner stops for the second window. 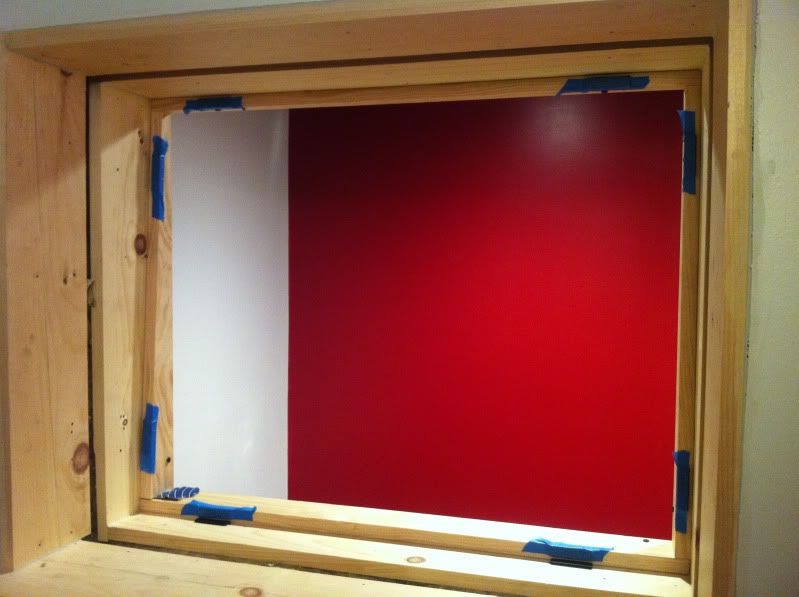 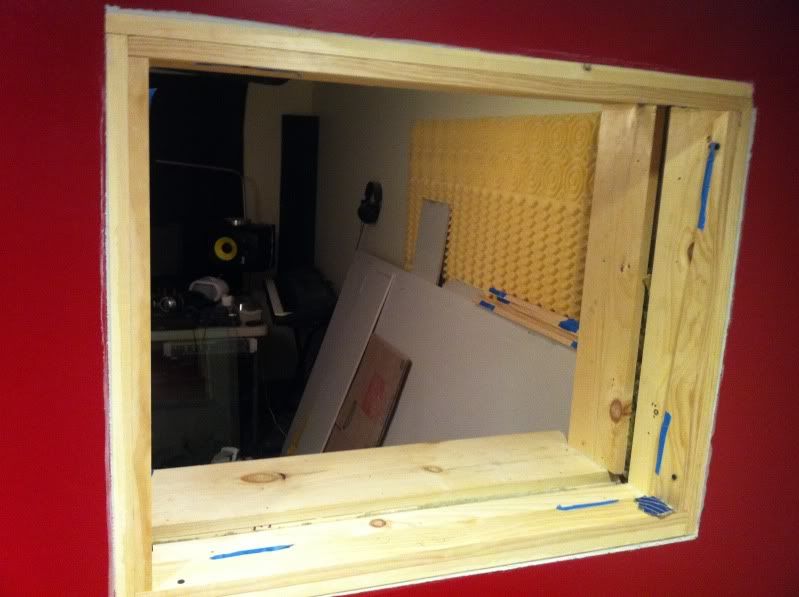 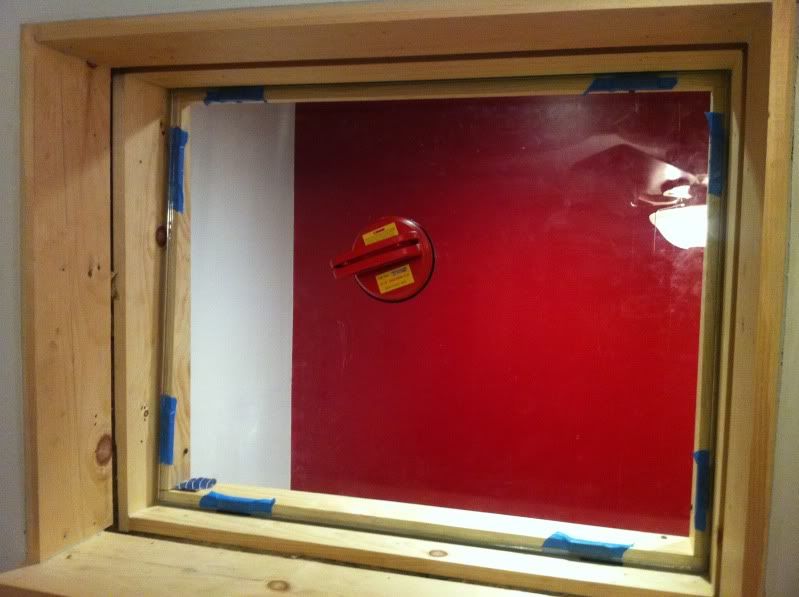 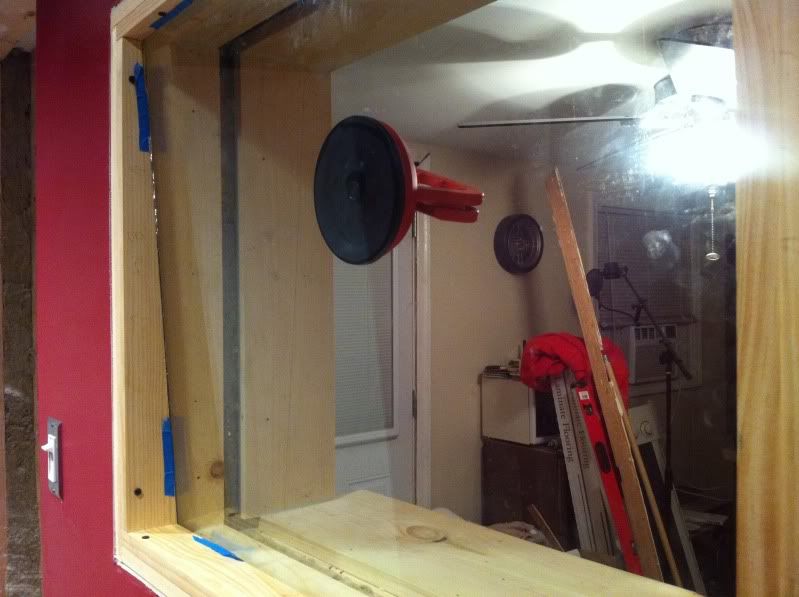 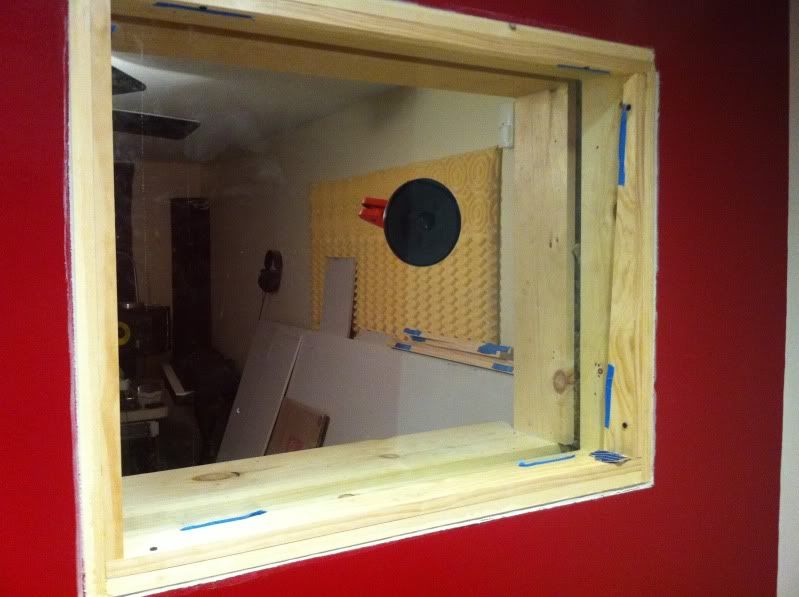 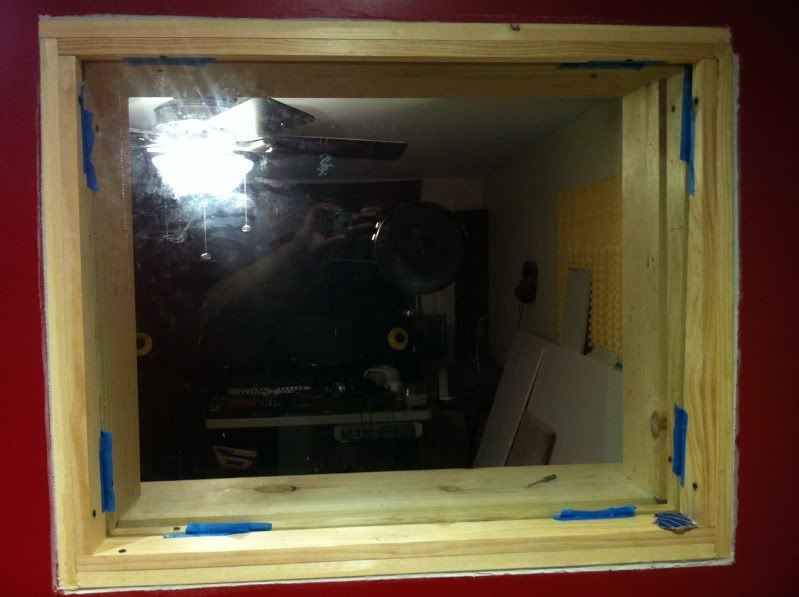 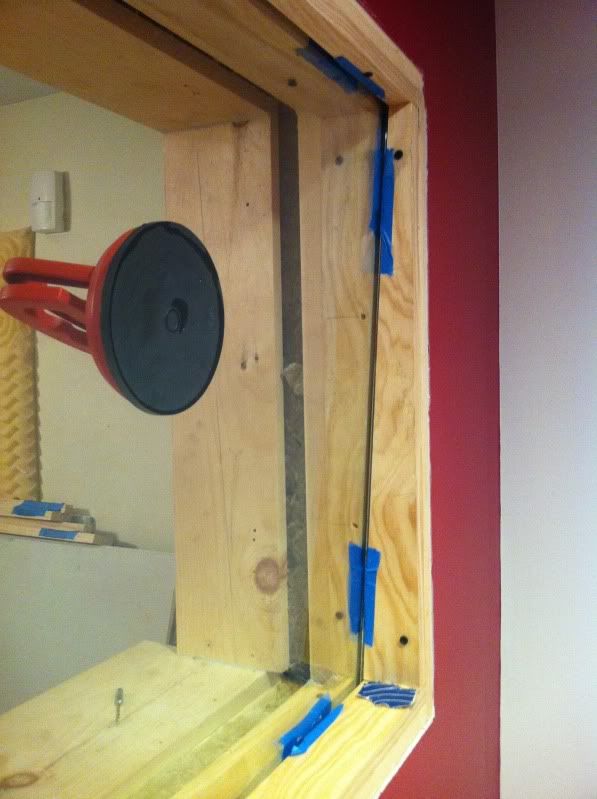 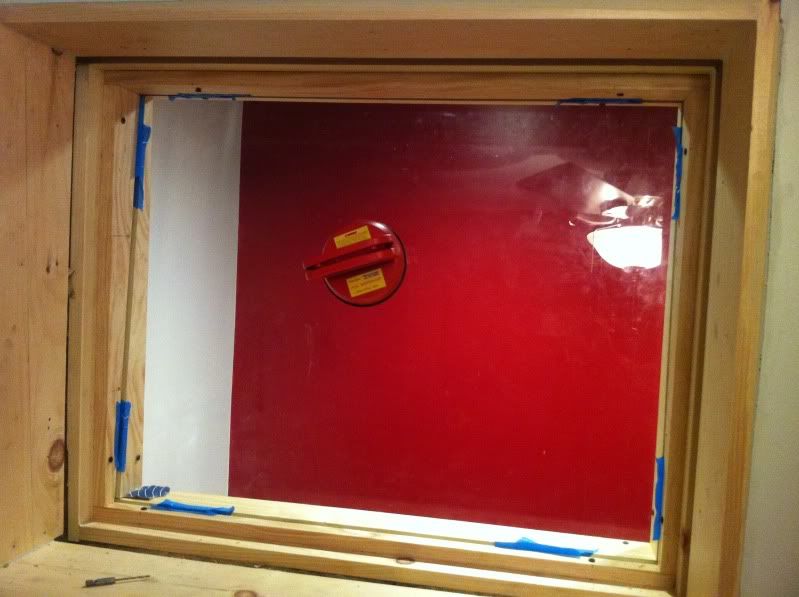 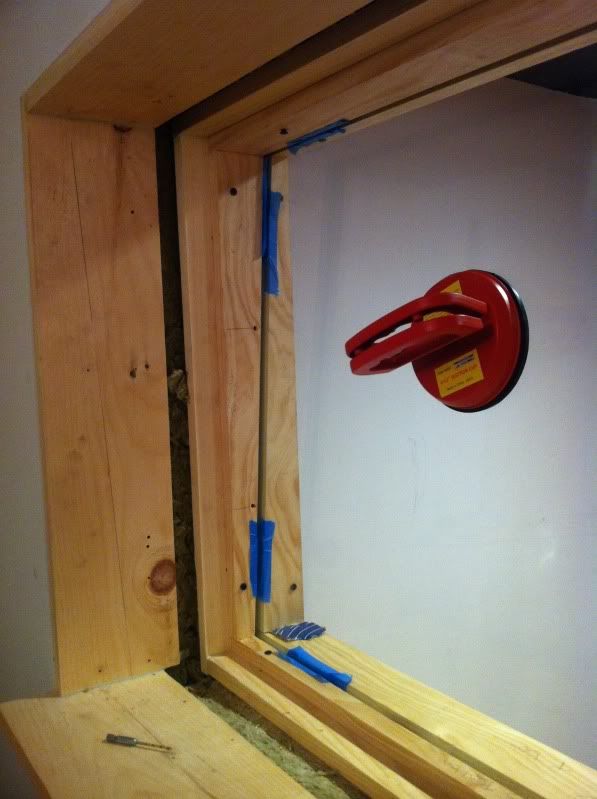 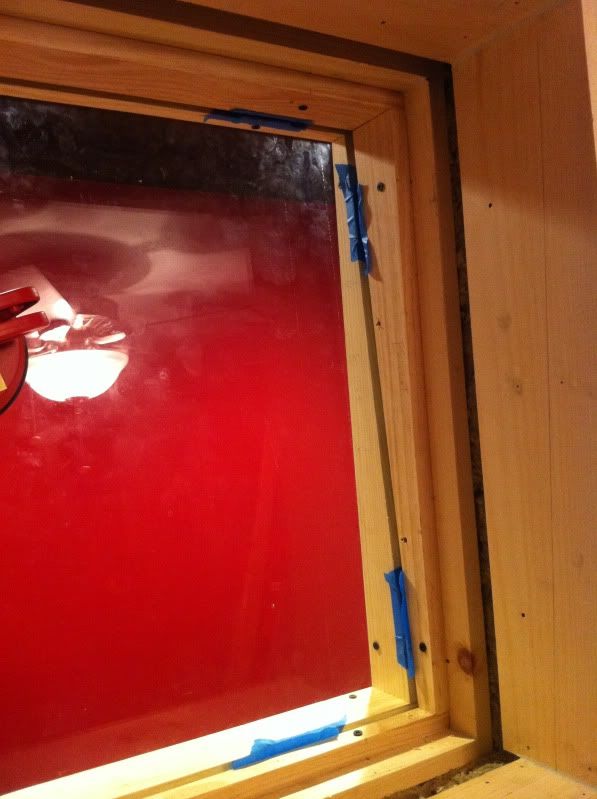
__________________
www.HellfireBeats.com UAD 2 Apollo Quad w/Thunderbolt 3, UAD 2 Satellite Octo TB3, UAD 2 Octo PCIe, Avid S1, Neve R6 500 Chasis, Neve Portico 511, Neve Portico 551, Dangerous DBox+, Focal Trio6 Be, Neumann TLM49, Akai MPC 2000XL, Akai MPC X, Mackie 1202VLZ Pro, Akai Advance 61 Pro Tools 2021.12 Mac Pro 7,1 2019, 8 Core, 48GB RAM - MacOS 11.6.2 16" MacBook Pro 2021, M1 Pro, 16GB RAM - MacOS 12.1 27" iMac, Late-2012, 3.4GHz i7, 24GB RAM - MacOS 10.15
|
|
|
|
 Similar Threads
|
||||
| Thread | Thread Starter | Forum | Replies | Last Post |
| Building guitar isolation cabinet and vocal booth | mastershredder | 003, Mbox 2, Digi 002, original Mbox, Digi 001 (Win) | 16 | 02-21-2006 07:16 PM |
| OT- Building a door for acoustic isolation | pedrohead | 003, Mbox 2, Digi 002, original Mbox, Digi 001 (Win) | 3 | 10-28-2003 09:21 AM |
| Makeshift Isolation booth probs | 6969 | 003, Mbox 2, Digi 002, original Mbox, Digi 001 (Win) | 6 | 02-03-2003 02:39 PM |
| Isolation booth | Phil O'Keefe | 003, Mbox 2, Digi 002, original Mbox, Digi 001 (Win) | 2 | 08-06-2002 12:54 AM |
| Isolation Booth | fresh_meat | 003, Mbox 2, Digi 002, original Mbox, Digi 001 (Win) | 3 | 07-18-2002 09:48 AM |


 Linear Mode

